VBA Tutorial Code
Create VBA shortcuts to Folder Paths
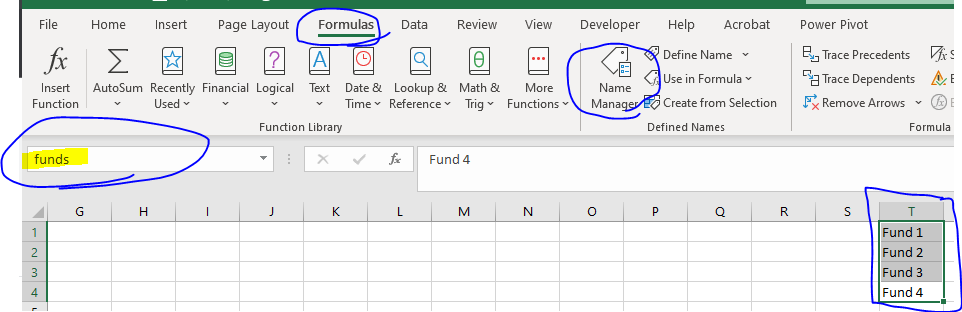
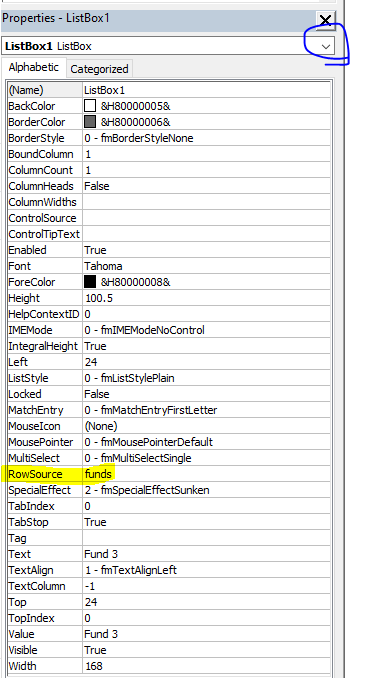
In the above video, I show you how to add a RowSource in the View > Properties Window in the Visual Basic Editor. This rowsource value, similar to my Youtube video https://www.youtube.com/watch?v=5R98mkoszaE in which I add the Rowsource with VBA code, lets you link to the pre-defined list of values in a range of cells in the Name Manager:
Code for Module 1:
Sub mm()

Range("X1").Value = ""

Dim sShortcutLocation As String

UserForm1.Show

nameofshortcut = InputBox("nickname for shortcut")

sShortcutLocation = Range("X1").Value
Select Case sShortcutLocation

'note .lnk for windows path shortcut
'note .url for Internet shortcut


Case 1
sShortcutLocation = "C:\Users\18622\OneDrive\Desktop\VBA Lessons\Funds\Fund 1\" & nameofshortcut & ".lnk"
Case 2
sShortcutLocation = "C:\Users\18622\OneDrive\Desktop\VBA Lessons\Funds\Fund 2\" & nameofshortcut & ".lnk"
Case 3
sShortcutLocation = "C:\Users\18622\OneDrive\Desktop\VBA Lessons\Funds\Fund 3\" & nameofshortcut & ".lnk"
Case 4
sShortcutLocation = "C:\Users\18622\OneDrive\Desktop\VBA Lessons\Funds\Fund 4\" & nameofshortcut & ".lnk"
End Select

targetfolderpath = InputBox("Paste your Path")

With CreateObject("WScript.Shell").CreateShortcut(sShortcutLocation)
    .TargetPath = targetfolderpath
    .Description = "Shortcut to the file" & targetfolderpath
     .Save
End With

End Sub
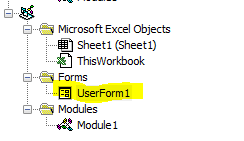
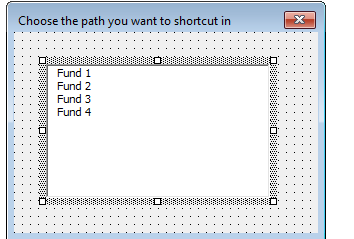
Userform1. To create, select Insert > Userform in the Visual Basic Editor Menu at the top. You'll see it below in the Project Explorer (if you have that open in View – Project Explorer.
Double Left click on the Userform1 in the Project Explorer, then left click the userform grey area
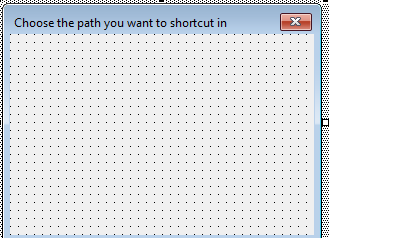
In the Visual Basic Editor menu, click View – Toolbox – and click the below Listbox and draw it on the Userform1.
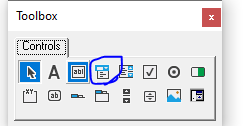
Click on the listbox1 by left-clicking the mouse in the toolbox above then left-click the Listbox that you drew.
Fill in the name that you created in the first image in this article next to RowSource for the Listbox in the properties window, which if you don't have open underneath your Project Explorer, then you can press View – Properties Window. In the circle below, you can cycle through the Objects (You can also change their names).
Code when you double click the listbox:
Private Sub ListBox1_Click()

If ListBox1.Value = "Fund 1" Then
Range("X1").Value = 1
End If

If ListBox1.Value = "Fund 2" Then
Range("X1").Value = 2
End If

If ListBox1.Value = "Fund 3" Then
Range("X1").Value = 3
End If

If ListBox1.Value = "Fund 4" Then
Range("X1").Value = 4
End If


Unload Me
End Sub
Excel VBA Filter