VBA Tutorial Code
Salesforce Hospital Mobile App How to
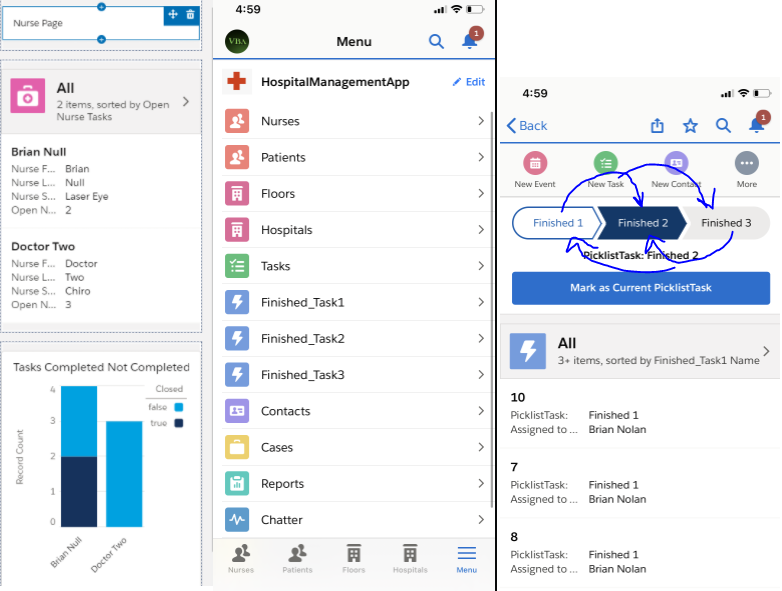
30 second video showing the mobile app. I create a task and assign it to a floor, hospital, nurse, AND/OR patient (you can customize). I have reports built for Nurse, Hospital, Floor, and Patients based on Open/Closed Tasks. So you can go to the Floors and have it sorted by most Open Floor tasks, or Nurses and have it sorted by most open nurse tasks, or Hospital and search for the most open hospital tasks. When you create a Task, it is a single task that gets related to multiple objects Nurse, Patient, Hospital, or Floor. When this single task gets completed, the task tagged to Floor, Nurse, Patient, AND/OR hospital also gets completed. The data remains there historically. The OPEN FLOOR TASKS/OPEN NURSE TASKS/etc de-aggregate and aggregate LIVE. So the sorting will help you to determine which floor or person is busiest in seconds. Create tasks from your phone. Close tasks. Assign tasks to people. Data updates live in reports.
I show how to set up mobile, Apple Watch, and desktop notifications at 2hr:07min below:
Part 1 – FULL VIDEO of me building this mobile app step-by-step. This article is just as good. 1:25:22 shows me moving tasks from object to object which also works on mobile for handing completed tasks back and forth and back and forth among people and getting notifications each time. This is different than new tasks or auto-assigned upload tasks which aggregate live on your record and also give you live notifications.
You can integrate Outlook on your mobile phone by using the Salesforce Outlook add-in.
Step 1: Google Salesforce Developer Edition free trial. Sign up for a free 14 day trial. You could track live statistics for workload by floor, hospital, nurse, patient, etc. This build would work for schools, groceries, warehouses/etc and supports massive volumes of data and live data reporting and charts and full audit history.
Step 2: Click the Gear –> Setup at the top right of the screen in Salesforce.
Step 3: Click Create –> ![]() Custom Object
Custom Object
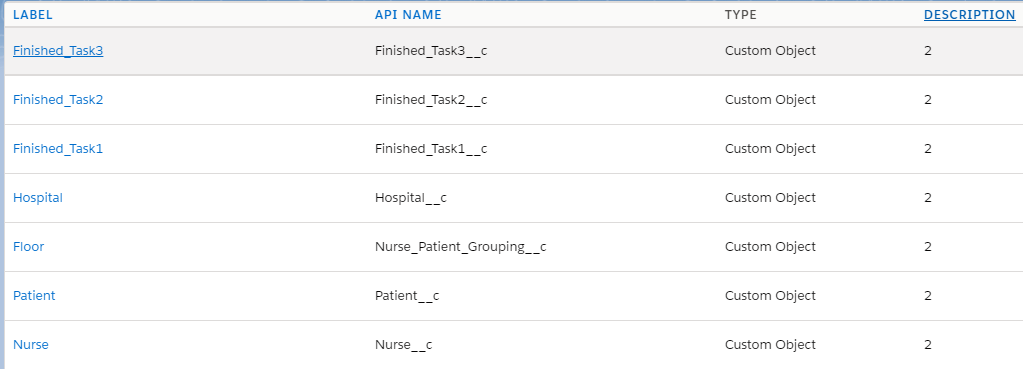
Step 4: Create the below 5 custom objects with these exact names. Click Save and New after filling it out like below. Plural Label is required too. (Copy my words exactly so my APEX code later works). Fill in Plural Label for each of below Labels too. Enter description as 1 for each Object so that you can sort in the Object Manager.

- Label – Nurse; Object Name = Nurse (Will appear as Nurse__c under API Name. Nurse__c will be used later in my APEX code to assign tasks at a Nurse level.
- Label – Hospital; Object Name = Hospital (Will appear as Hospital__c under API Name. Hospital__c will be used later in my APEX code to assign tasks at a Hospital level.
- Label – Patient; Object Name = Patient (Will appear as Patient__c under API Name. Patient__c will be used later in my APEX code to assign tasks at a Patient level.
- Label – Floor; Object Name = Nurse_Patient_Grouping (Will appear as Nurse_Patient_Grouping__c under API Name. Nurse_Patient_Grouping__c will be used later in my APEX code to assign tasks at a Floor level.
- Label – Finished_Task1; Object Name = Finished_Task1 (Will appear as Finished_Task1__c under API Name. Finished_Task1__c will be used later in my APEX code to create a new record whenever a task is marked as "Completed" if you select Finish 1 in my Picklist which I'll show much later. This picklist will be useful for handing tasks back and forth and back and forth on mobile after they are completed.
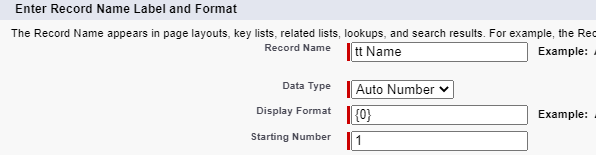
- Use Autonumber type for Name Field (Column 1)
- {0} format and starting number = 1 like below before saving Finished_Task1. If you think about my Access 1-to-1 relationship video, then you can use this to relate if need be.
- Use Autonumber type for Name Field (Column 1)
- Users can have their own object for Historical Tasks or to log their time for the day in addition to their own record with assigned tasks whichever view they want. For now just make the three objects Label/object name/plural: Finished_Task1, Finished_Task2, Finished_Task3 to learn how to set up the back and forth and back and forth with completed tasks. Normally, you just finish the task and mark as complete and all relevant parties receive a mobile phone notification and the relevant open tasks de-aggregates live for everything. However, in the case with Finished_Task1/Finished_Task2/Finished_Task3 you have the option to send it to other people specifically with a Picklist that I show you how to setup later. People can pass the task back and forth as many times as they want for even more fluidity of the work.
6. Create Finished_Task2 and Finished_Task3 like above. You don't create any fields until I create the picklists.
Image of above objects:
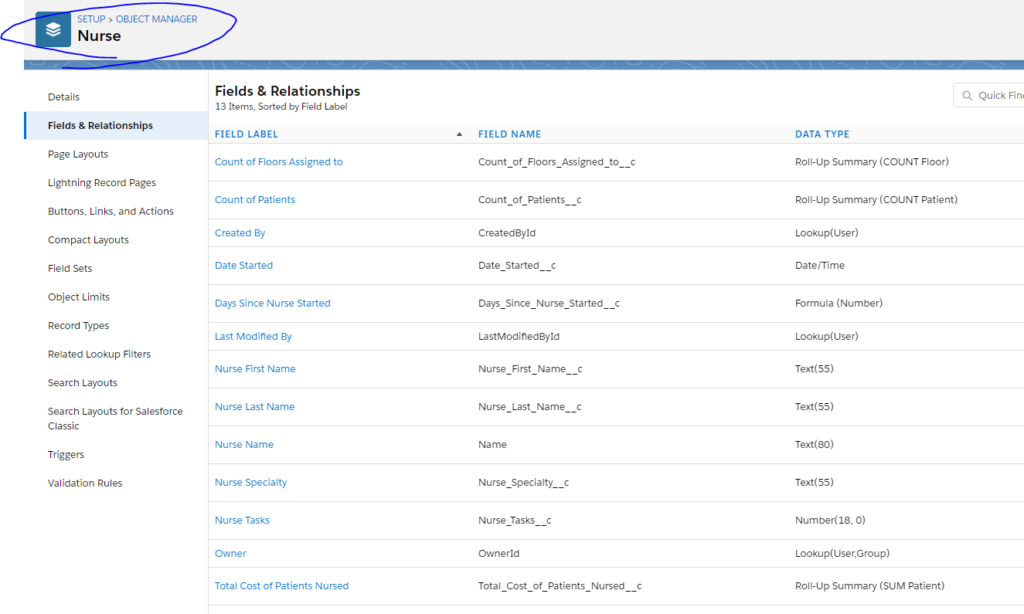
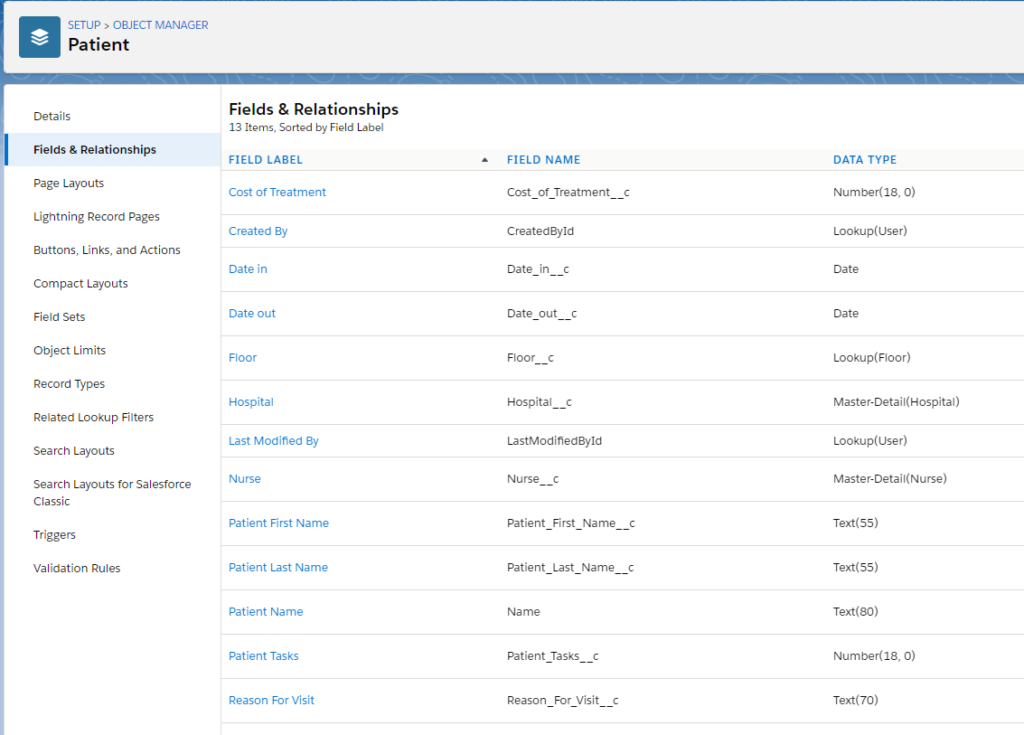
Step 5: (If you do Step 7 then 8 then Step 5& 6 you can create everything without switching back and forth). Create the below fields in Nurse Object in Setup – Object Manager – Nurse – Fields & Relationships. Please note that Roll-Up Summary can only be created after you create Master-Detail fields in those respective objects (e.g. Patient Master-Detail referencing Nurse), so for now just create the yellow fields and then come back after you make the Master-Detail on the other objects. (If you don't understand Master-Detail, then Master-Detail enables the related object to have a Related List when you click the first column for the object who contains the Master-Detail referencing the respective object. Master-Detail also lets the related object have a Roll-up Count or Roll-up Summary (of number fields) of the object that has the Master-Detail field on it.
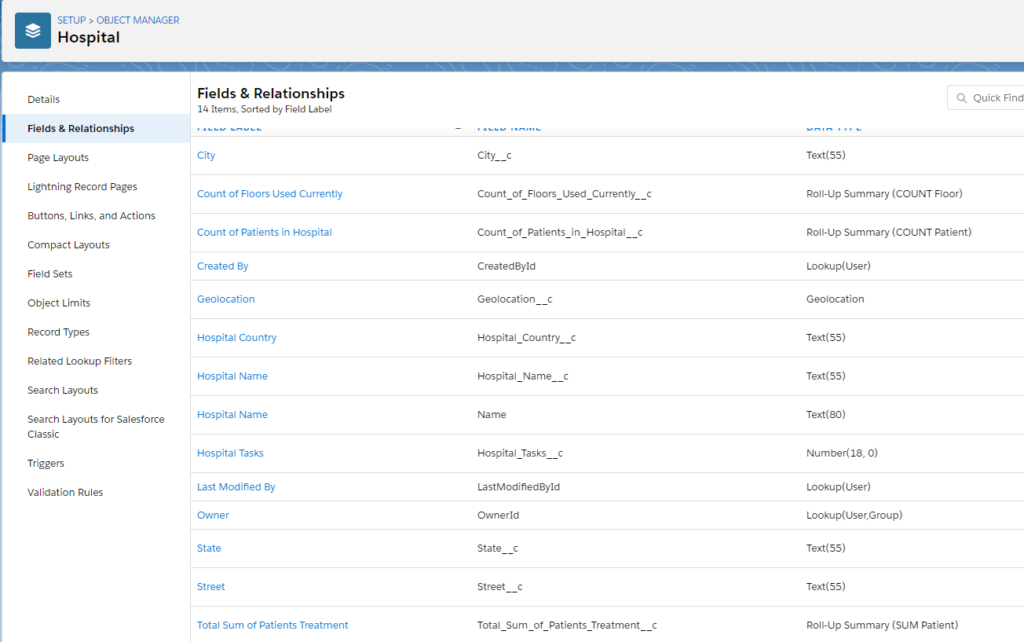
Step 6: Create the below fields in Hospital Object.
Step 7: Create the below fields in the Patient Object.
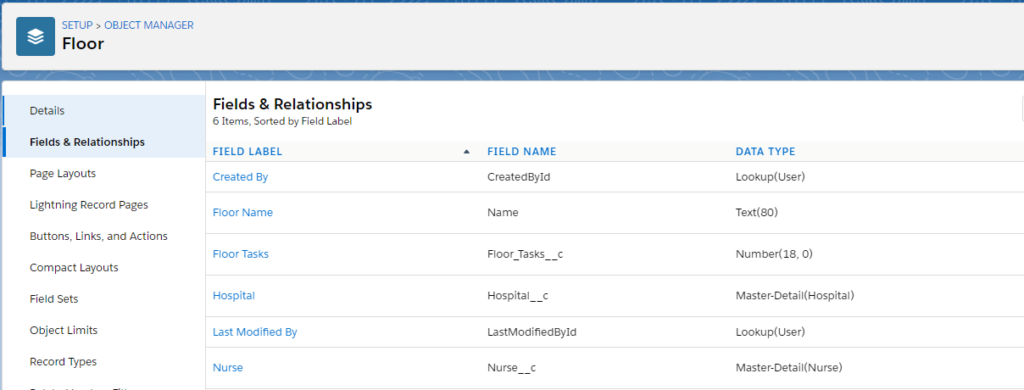
Step 8: Create the below fields in the Floor / Nurse_Patient_Grouping Object. The Label must be Floor. The Object Name (API Name) must be Nurse_Patient_Grouping. Also, on a totally different note than last sentence, enter Floor as the Label for the (Field Name) Name.
Step 9: Activity Object: Create the below Lookups –> note that Activity is the way to add fields to Tasks.


Step 10: Create Tabs for these custom objects. Press Gear Setup –> Tabs –> Press New ![]() –> Press Object Name as these Five Objects (Nurse, Patient, Floor, Hospital, Finished Task). Select which Tab Style
–> Press Object Name as these Five Objects (Nurse, Patient, Floor, Hospital, Finished Task). Select which Tab Style ![]() . The Tab Style will be the logo on the mobile app as shown below. Just choose logical Tab Styles. I did a building for Nurse Patient Grouping 2 (which will show as Floors for you) since a building evokes the idea of Floors.
. The Tab Style will be the logo on the mobile app as shown below. Just choose logical Tab Styles. I did a building for Nurse Patient Grouping 2 (which will show as Floors for you) since a building evokes the idea of Floors.
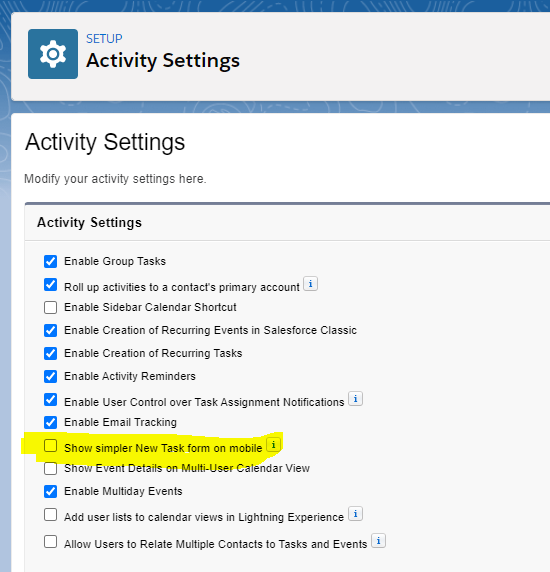
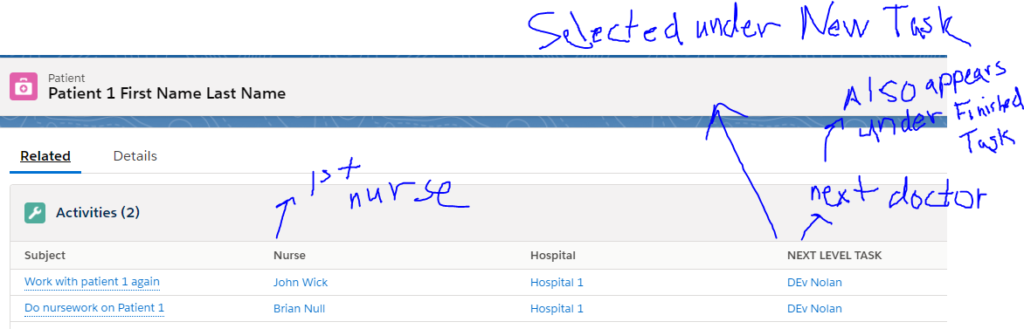
Additional sidenote: Uncheck show simpler New Task here in SETUP so that on mobile you can assign tasks to multiple custom fields:
Step 11: Setup (Gear) – App Manager – New Lightning App ![]() .
.
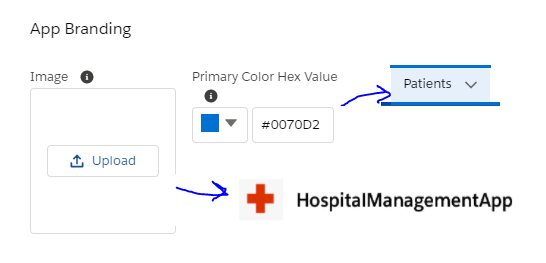
The App Name you select here: ![]()
Will appear on the Mobile app. It will also be how you search for the app on the desktop for Salesforce. ![]()
Press Next, Next, Next Until you reach Navigation Items.
Step 12: Select the Navigation Items which will be the Menu items on the desktop for this app.

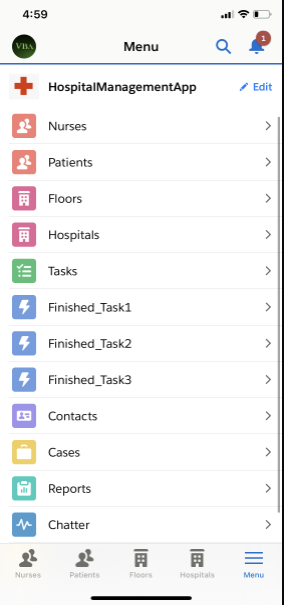
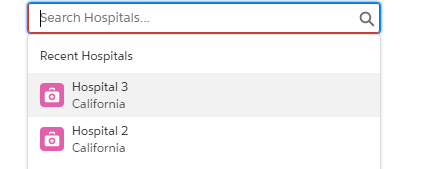
Navigation Items will also be the sections on the mobile application as pictured below. Move the below choices from Nurses to Reports by clicking RIGHT ![]() and moving for example Nurse from "Available Items" to "Selected Items." Please keep in mind that Mobile Users can click these objects on the phone and press Star and click their profile image at the top left for their favorite sections. You can also customize the mobile design even further. What is particularly cool is you can get notifications, reminders of tasks, and the APEX code I show you eventually executes from a phone too so everyone can move in sync with instantaneous data updates so you can see which floor is busiest, which nurse is busiest currently and historically, get an audit history of anyone you talk to or any patient, see which hospital tasks, patient tasks, floor tasks, nurse tasks…etc. If anyone gets over-flooded you can lend a hand.
and moving for example Nurse from "Available Items" to "Selected Items." Please keep in mind that Mobile Users can click these objects on the phone and press Star and click their profile image at the top left for their favorite sections. You can also customize the mobile design even further. What is particularly cool is you can get notifications, reminders of tasks, and the APEX code I show you eventually executes from a phone too so everyone can move in sync with instantaneous data updates so you can see which floor is busiest, which nurse is busiest currently and historically, get an audit history of anyone you talk to or any patient, see which hospital tasks, patient tasks, floor tasks, nurse tasks…etc. If anyone gets over-flooded you can lend a hand.
Step 13: Add User Profiles who can view the App you are creating. If you watch my Salesforce Users video, then you can see how you can set different permissions for different levels of the organization. You can also let patients become a part of the mobile experience and personalize how they're feeling or assign tasks to their nurses. You can hide information from certain people too. I select System Administration for now since I'm a System admin as the first Salesforce user. Click Save and Finish.
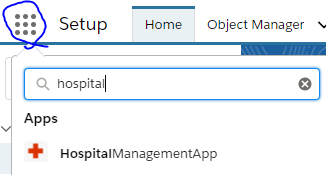
Step 14: Click the App searcher at the top left of your Salesforce instance. Search for the App you just created. Click the app.
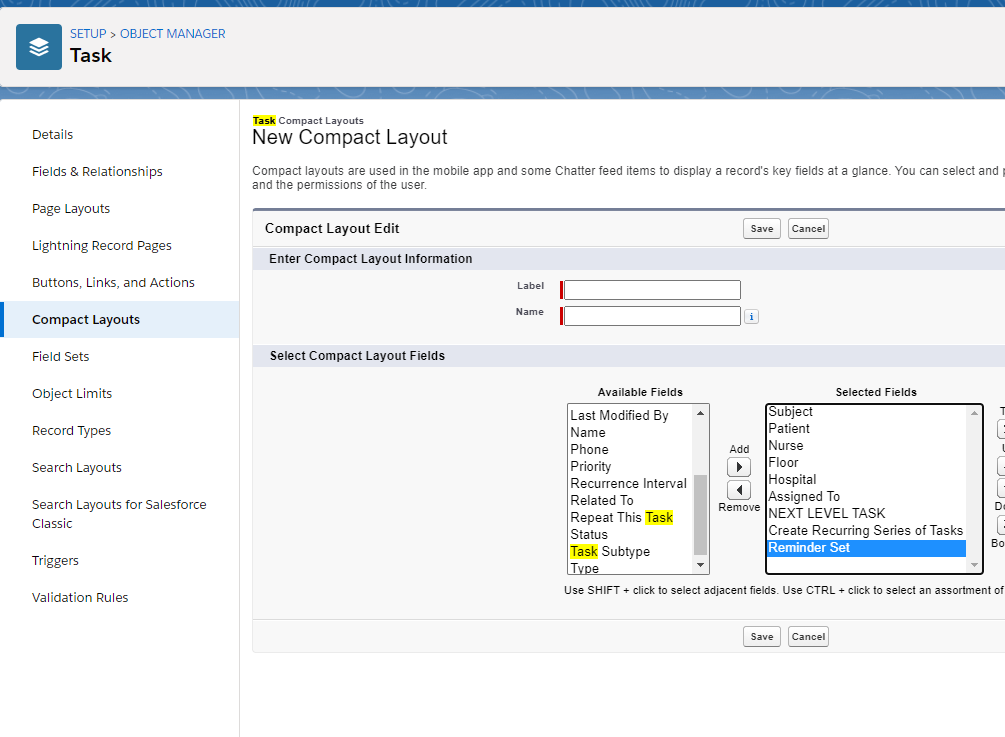
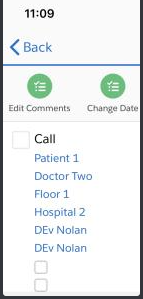
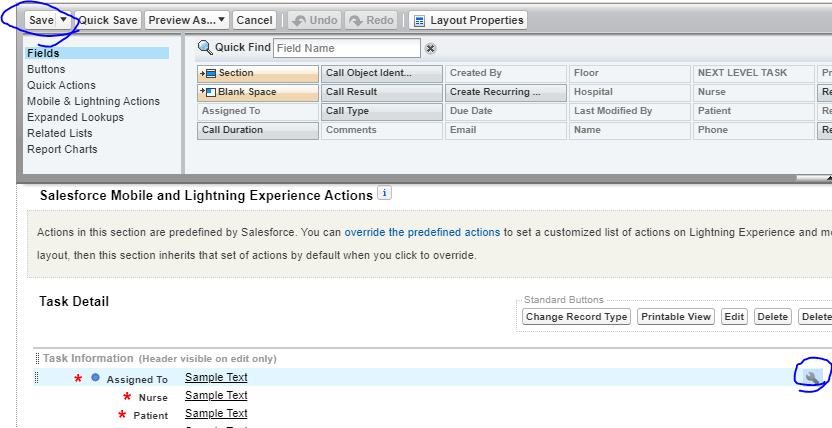
Sidenote before Step 15: If you want to customize your Tasks page layout on the mobile application for Salesforce, then go to Setup – Task – Compact Layouts – Press New. Add the columns you want to the right-hand side. Click Save. Click Edit Compact Layout Assignment – Edit Assignment – Set Primary Compact Layout to the Layout that you just created and saved like below. Compact Layouts show more fields under each already created task when you go to your Task page on the Salesforce mobile app and even more fields when you click on a Task. This enables you to check the box when you click in on a task on mobile and mark as complete faster.
Additional sidenote: If you want certain fields to be required to be filled out on the mobile app when you click New Task then go to Setup – Task – Page Layouts – Task Layout, and make that field required by clicking the wrench and checking "Required."
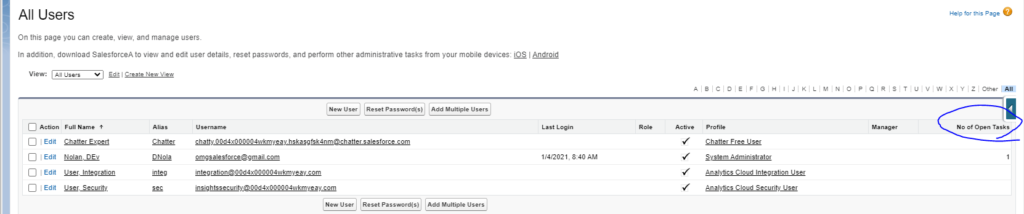
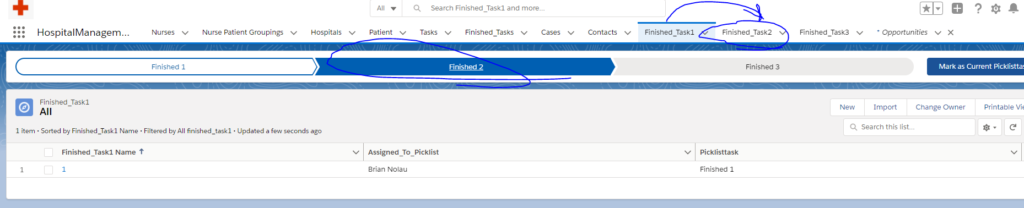
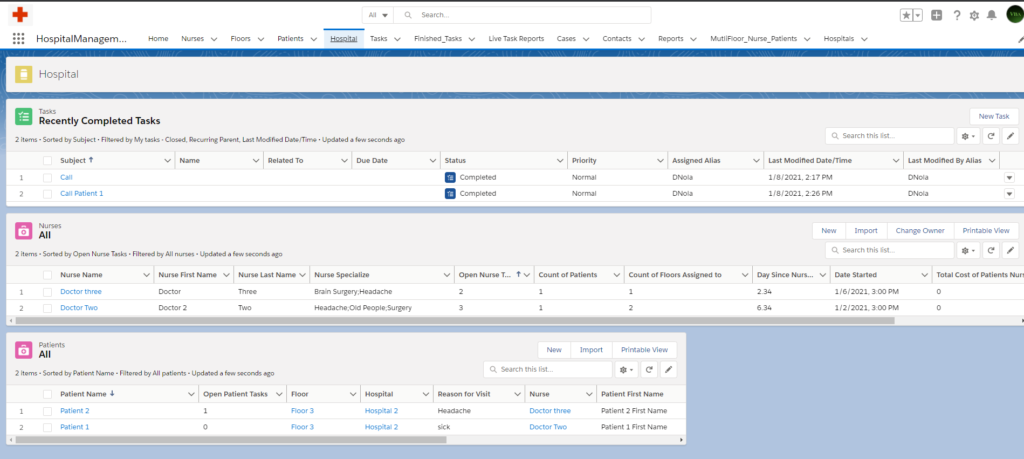
Step 15: All of your objects will be blank you'll see the below at the top of the screen.
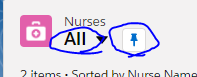
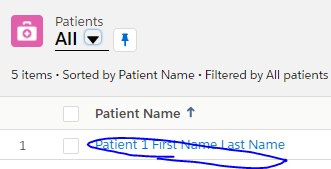
Step 16: Select each Menu Object. For example, Select Nurses. Select the down arrow, select All, click the pin to make this your default Custom List View. Do this for all Objects.
For tasks, do the same. Also click here and select the Table View. You
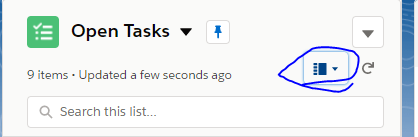
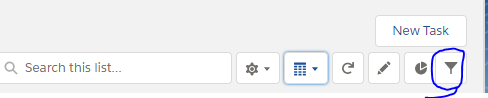
For tasks, also click the filter at the top right:
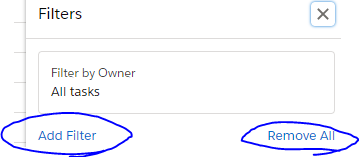
Click Remove All and filter by All Owners All Tasks:
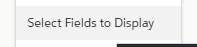
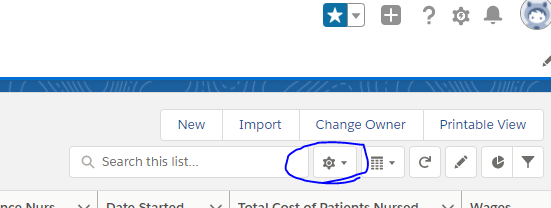
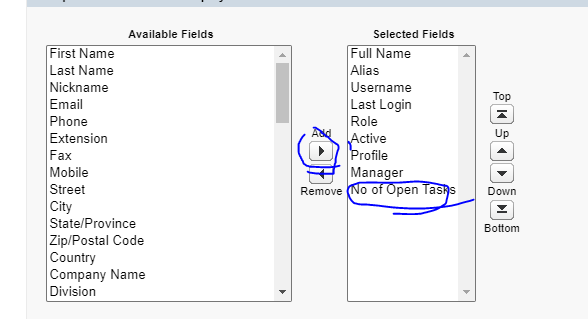
Step 17: Add your fields (Columns) to each object. Select the Gear on each of the objects and choose Select Fields to Display.
Nurse:


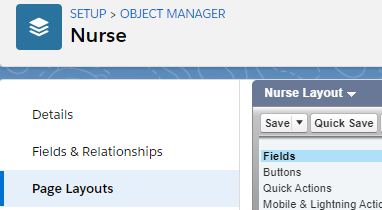
Step 18: Now you're going to do the Page Layouts for each of the 5 objects. Press Setup (Gear) Select Object Manager ![]()
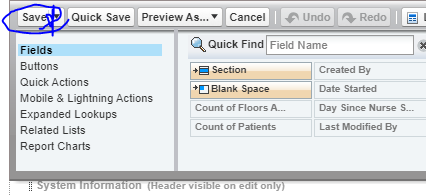
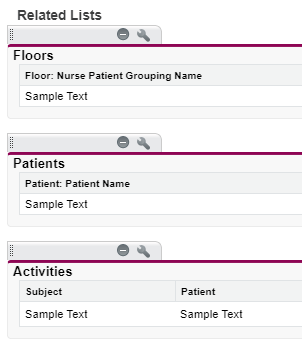
Select Nurse, select Page Layouts. Select ![]() Scroll down to Related Lists as pictured below two images down.
Scroll down to Related Lists as pictured below two images down.

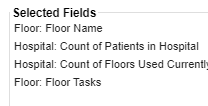
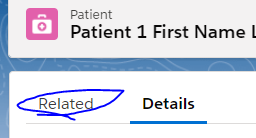
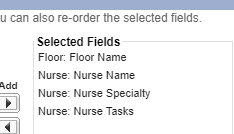
Click the wrench for Floor add these. Press OK. These appear when on the Nurse Object you click the first column and then select Related. 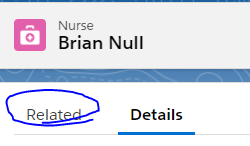
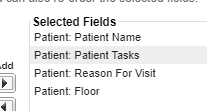
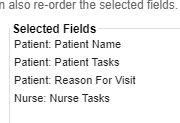
Click the wrench for Patients and add these. Press OK.
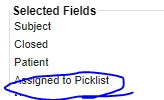
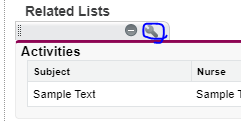
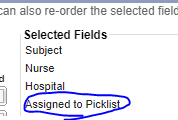
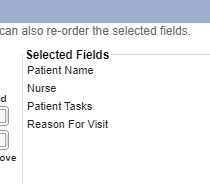
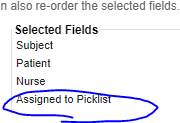
Click the wrench for Activities and add the below columns as the top 4 and press OK. Please note Assigned to Picklist will be created later and cannot be assignned now.
Select SAVE at the top of the page.
Setup – Object Manager – Patient – Page Layout 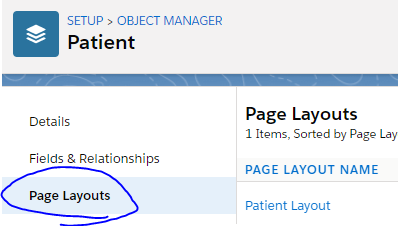
Click Patient Layout under Page Layout Name. 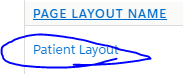
Scroll down to Related Lists. click the wrench next to Activities.
Add the below columns as the top 4 and press OK. (assigned to picklist you can add later).
Click Save at the top: 
(Sidenote, these appear under Patient object as depicted below when you click the blue text in the first column and go to related. 🙂
Setup – – Object Manager – Hospital – Page Layout – scroll down
Floors – wrench – add these. Select whichever top 4 you want.
Patients add these:
Activities:

Setup – Object Manager – Floor – Page Layout – scroll down
Click wrench for Patient:
Click wrench for Activities (assigned to picklist you can add later).
Scroll up and Save.
IMPORTANT: go to setup – Object Manager – User – Fields & relationships. New. Create a column called No of Open Tasks.


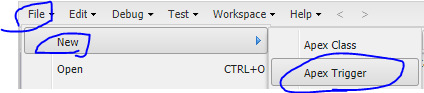
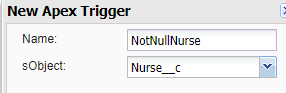
Step 19: Now you're going to add the APEX code to aggregate the Number of Tasks for Floors, Nurses, Patients, Hospitals, and Users. Click the gear at the top right and select Developer Console.

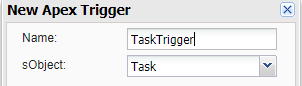
File – New – Apex Trigger:
Fill this out and press Submit.
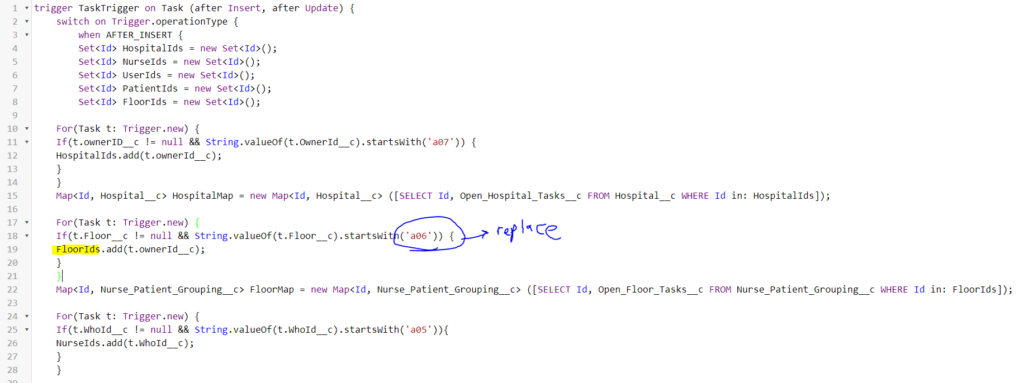
Paste the below APEX code (You'll need to alter only 8 things I'll explain at the bottom after the code):
trigger TaskTrigger2 on Task (after Insert, after Update) {
switch on Trigger.operationType {
        when AFTER_INSERT {
        Set<Id> HospitalIds = new Set<Id>();
        Set<Id> NurseIds = new Set<Id>();
        Set<Id> UserIds = new Set<Id>();
        Set<Id> PatientIds = new Set<Id>();
        Set<Id> FloorIds = new Set<Id>();

	For(Task t: Trigger.new) {
	If(t.ownerID__c != null && String.valueOf(t.OwnerId__c).startsWith('a07')) {
	HospitalIds.add(t.ownerId__c);
    }
	}
	Map<Id, Hospital__c> HospitalMap = new Map<Id, Hospital__c> ([SELECT Id, Hospital_Tasks__c FROM Hospital__c WHERE Id in: HospitalIds]);

    For(Task t: Trigger.new) {
	If(t.Floor__c != null && String.valueOf(t.Floor__c).startsWith('a06')) {
	FloorIds.add(t.Floor__c);
    }
	}
	Map<Id, Nurse_Patient_Grouping__c> FloorMap = new Map<Id, Nurse_Patient_Grouping__c> ([SELECT Id, Floor_Tasks__c FROM Nurse_Patient_Grouping__c WHERE Id in: FloorIds]);

    For(Task t: Trigger.new) {
	If(t.WhoId__c != null && String.valueOf(t.WhoId__c).startsWith('a05')){
	NurseIds.add(t.WhoId__c);
    }
	}


	Map<Id, Nurse__c> NurseMap = new Map<Id, Nurse__c> ([SELECT Id, Nurse_Tasks__c FROM Nurse__c WHERE Id in: NurseIds]);


    	For(Task t: Trigger.new) {
	If(t.OwnerId != null && String.valueOf(t.OwnerId).startsWith('005')) {
	UserIds.add(t.OwnerId);
    }
	}

	Map<Id, User> UserMap = new Map<Id, User> ([SELECT Id, No_Of_Open_Tasks__c FROM User WHERE Id in: UserIds]);

    For(Task t: Trigger.new) {
	If(t.WhatID__c != null && String.valueOf(t.WhatId__c).startsWith('a08')) {
	PatientIds.add(t.WhatId__c);
    }
	}
	Map<Id, Patient__c> PatientMap = new Map<Id, Patient__c> ([SELECT Id, Patient_Tasks__c FROM Patient__c WHERE Id in: PatientIds]);

	For(Task t :Trigger.new) {
	If(HospitalMap.containsKey(t.OwnerId__c)) {
	HospitalMap.get(t.OwnerId__c).Hospital_Tasks__c += 1;
	}
	}
	Update HospitalMap.values();

    For(Task t :Trigger.new) {
	If(FloorMap.containsKey(t.Floor__c)) {
	FloorMap.get(t.Floor__c).Floor_Tasks__c += 1;
	}
	}
	Update FloorMap.values();

    For(Task t :Trigger.new) {
	If(NurseMap.containsKey(t.WhoId__c)) {
	NurseMap.get(t.WhoId__c).Nurse_Tasks__c += 1;
    }
    }
    Update NurseMap.values();

    For(Task t :Trigger.new) {
	If(PatientMap.containsKey(t.WhatId__c)) {
	PatientMap.get(t.WhatId__c).Patient_Tasks__c += 1;
    }
    }
    Update PatientMap.values();

    For(Task t :Trigger.new) {
	If(UserMap.containsKey(t.OwnerId)) {
	UserMap.get(t.OwnerId).No_of_Open_Tasks__c += 1;
	}
	}
	Update UserMap.values();
	}

        when AFTER_UPDATE {
    	Set<Id> HospitalIds = new Set<Id>();
        Set<Id> NurseIds = new Set<Id>();
         Set<Id> UserIds = new Set<Id>();
            Set<Id> PatientIds = new Set<Id>();
             Set<Id> FloorIds = new Set<Id>();

	For(Task t : Trigger.new) {
	If(t.IsClosed && !Trigger.oldMap.get(t.Id).IsClosed && t.OwnerId__c != null && String.valueOf(t.OwnerId__c).startsWith('a07')) {
	HospitalIds.add(t.OwnerId__c);
    }
	}

    For(Task t : Trigger.new) {
	If(t.IsClosed && !Trigger.oldMap.get(t.Id).IsClosed && t.Floor__c != null && String.valueOf(t.Floor__c).startsWith('a06')) {
	FloorIds.add(t.Floor__c);
    }
	}

    For(Task t : Trigger.new) {
	If(t.IsClosed && !Trigger.oldMap.get(t.Id).IsClosed && t.WhoId__c != null && String.valueOf(t.WhoId__c).startsWith('a05')) {
	NurseIds.add(t.WhoId__c);
    }
	}

    For(Task t : Trigger.new) {
	If(t.IsClosed && !Trigger.oldMap.get(t.Id).IsClosed && t.WhatId__c != null && String.valueOf(t.WhatId__c).startsWith('a08')) {
	PatientIds.add(t.WhatId__c);
    }
	}


     For(Task t : Trigger.new) {
	If(t.IsClosed && !Trigger.oldMap.get(t.Id).IsClosed && t.OwnerId != null && String.valueOf(t.OwnerId).startsWith('005')) {
	UserIds.add(t.OwnerId);
    }
	}

	Map<Id, Hospital__c> HospitalMap = new Map<Id, Hospital__c>([SELECT Id, Hospital_Tasks__c FROM Hospital__c WHERE Id in :HospitalIds]);
	Map<Id, Nurse__c> NurseMap = new Map<Id, Nurse__c>([SELECT Id, Nurse_Tasks__c FROM Nurse__c WHERE Id in :NurseIds]);
    Map<Id, User> UserMap = new Map<Id, User>([SELECT Id, No_Of_Open_Tasks__c FROM User WHERE Id in :UserIds]);
    Map<Id, Patient__c> PatientMap = new Map<Id, Patient__c>([SELECT Id, Patient_Tasks__c FROM Patient__c WHERE Id in :PatientIds]);
    Map<Id, Nurse_Patient_Grouping__c> FloorMap = new Map<Id, Nurse_Patient_Grouping__c>([SELECT Id, Floor_Tasks__c FROM Nurse_Patient_Grouping__c WHERE Id in :FloorIds]);

	For(Hospital__c con : HospitalMap.values()) {
	Con.Hospital_Tasks__c = 0;
	}

    For(Nurse_Patient_Grouping__c flor : FloorMap.values()) {
	flor.Floor_Tasks__c = 0;
	}

    For(Nurse__c led : NurseMap.values()) {
	led.Nurse_Tasks__c = 0;
	}


    For(User usr : UserMap.values()) {
	usr.No_of_open_tasks__c = 0;
	}

     For(Patient__c Ptt : PatientMap.values()) {
	Ptt.Patient_Tasks__c = 0;
	}

	For(AggregateResult ar : [SELECT OwnerId__c, Count(Id) total FROM Task WHERE IsClosed = false AND OwnerId__c in :HospitalIds GROUP BY OwnerId__c]) {
	String who = String.Valueof(ar.get('OwnerId__c'));
	Decimal total = (Decimal)(ar.get('total'));
	HospitalMap.get(who).Hospital_Tasks__c = total;
	}
	update HospitalMap.values();

    For(AggregateResult ar : [SELECT Floor__c, Count(Id) total FROM Task WHERE IsClosed = false AND Floor__c in :FloorIds GROUP BY Floor__c]) {
	String who = String.Valueof(ar.get('Floor__c'));
	Decimal total = (Decimal)(ar.get('total'));
	FloorMap.get(who).Floor_Tasks__c = total;
	}
	update FloorMap.values();

    For(AggregateResult ar : [SELECT WhatId__c, Count(Id) total FROM Task WHERE IsClosed = false AND WhatId__c in :PatientIds GROUP BY WhatId__c]) {
	String who = String.Valueof(ar.get('Whatid__c'));
	Decimal total = (Decimal)(ar.get('total'));
	PatientMap.get(who).Patient_Tasks__c = total;
	}
	update PatientMap.values();

    For(AggregateResult ar : [SELECT WhoId__c, Count(Id) total FROM Task WHERE IsClosed = false AND WhoId__c in :NurseIds GROUP BY WhoID__c]) {
	String who = String.Valueof(ar.get('WhoId__c'));
	Decimal total = (Decimal)(ar.get('total'));
	NurseMap.get(who).Nurse_Tasks__c = total;
	}
	update NurseMap.values();


    For(AggregateResult ar : [SELECT OwnerId, Count(Id) total FROM Task WHERE IsClosed = false AND OwnerId in :UserIds GROUP BY OwnerID]) {
	String who = String.Valueof(ar.get('OwnerId'));
	Decimal total = (Decimal)(ar.get('total'));
	UserMap.get(who).No_of_Open_Tasks__c = total;
	}
	update UserMap.values();

        }
    	}
}
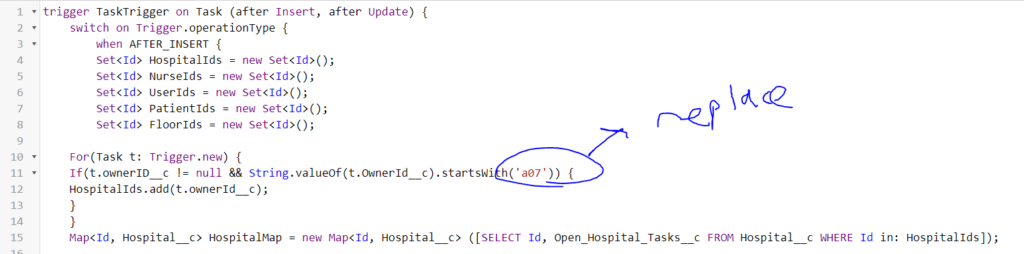
To alter properly, you need to replace the prefix at 8 locations.

To replace the prefix properly, use the below code here:

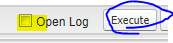
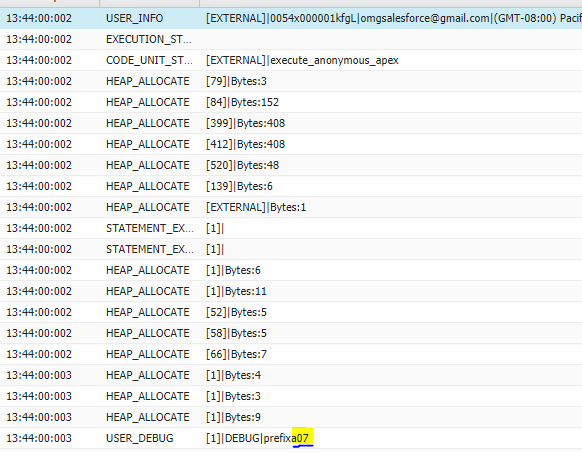
On the Execute Anonymous Window, fill out the below code and then press Execute after checking Open Log. Replace (Hospital__c) which each object prefix that you need. You'll need to replace prefix for (Nurse__c, Hospital__c, Patient__c, Nurse_Patient_Grouping__c). Just write down the prefix which I'll explain next. Use below code in Execute Anonymous Window.
system.debug('prefix' + Hospital__c.sobjecttype.getDescribe().getKeyPrefix());
Write down prefix from here after clicking Execute, in my case the Hospital object is a07. Please note the PREFIX IS CASE SENSITIVE SO LOWERCASE AND UPPERCASE MATTERS. YOU NEED TO ENTER THE BELOW PREFIX into the APEX CODE THAT I GAVE ABOVE:
You can close the log after getting the prefix by clicking the x:

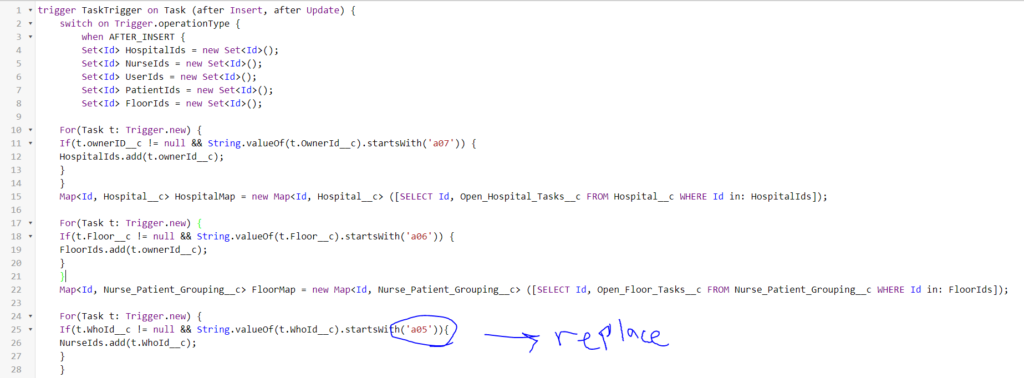
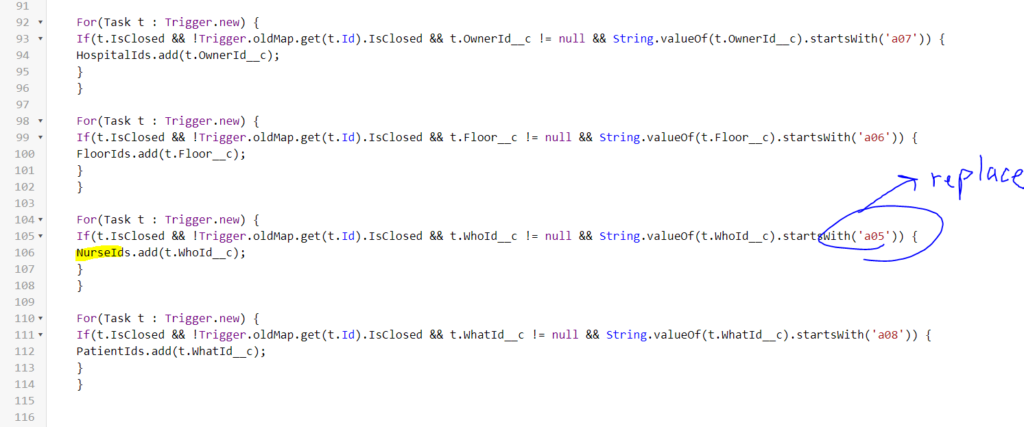
Navigate back to your TaskTrigger Apex code and replace the prefix for Hospital here and here:

Now rinse and repeat for Nurse by doing the below.

Click Execute and write down the prefix. Close the log: ![]()
Replace prefixes in two places for Nurse now.
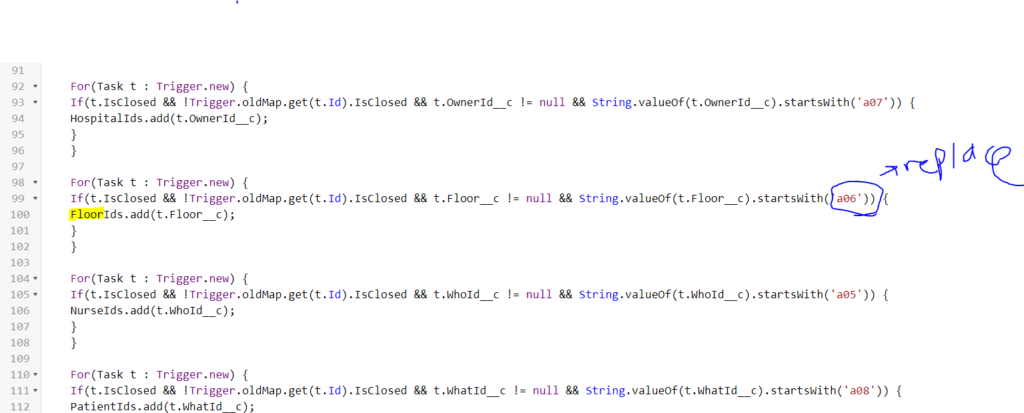
Now rinse and repeat for Floor.

Click Execute and write down the prefix. Close the log: ![]()
Replace Prefixes in two places for Floor as depicted below.
Rinse and repeat one last time for Patient.

Click Execute and write down the prefix. Close the log: ![]()
Replace Prefixes in two places for Patient as depicted below.


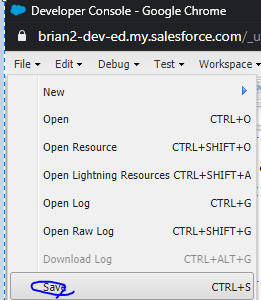
NOW THAT YOURE DONE WITH THE TASK AGGREGATOR VIA APEX CODE FOR Open_Nurse_Tasks, Open_Patient_Tasks, Open_Floor_Tasks, Open_Hospital_Tasks press SAVE at the top.
As a sidenote, please note that No Of Open Tasks under the User – Users – in if you click edit ![]() near the User and add a 0 as shown below….
near the User and add a 0 as shown below….
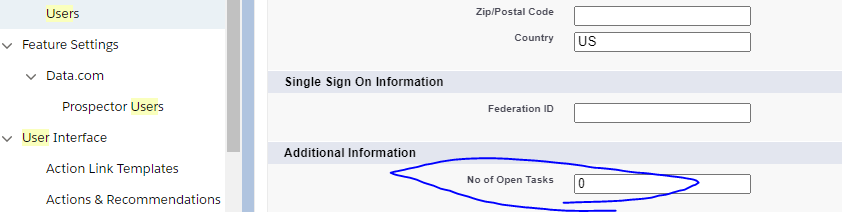
additional sidenote click edit here:
add no of open tasks.
Go back to your Developer Console.
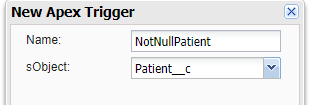
Create a new APEX Trigger.

Place in the below code.
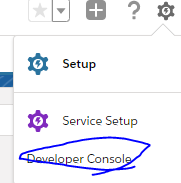
trigger HospitalNotNull on Hospital__c (before insert) { for(Hospital__c acc: Trigger.new) { acc.Hospital_Tasks__c = 0; } }Select Save:

Create another APEX Trigger.
paste in the below code.
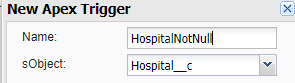
trigger NotNullFloor on Nurse_Patient_Grouping__c (before insert) { for(Nurse_Patient_Grouping__c acc: Trigger.new) { acc.Floor_Tasks__c = 0; } }Select Save
Create another APEX Trigger.
Paste in the below code:
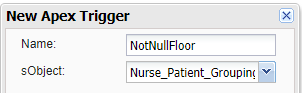
trigger notnullNurse on Nurse__c (before insert) { for(Nurse__c acc: Trigger.new) { acc.Nurse_Tasks__c = 0; } }Select Save.
Create another APEX Trigger.
Paste the below code.
trigger NotNullPatient on Patient__c (before insert) { for(Patient__c acc: Trigger.new) { acc.Patient_Tasks__c = 0; } }Select save.
Create Picklists for the Path and passing tasks from Object to Object. Unlimited task passing:
Create Picklist Value Sets called Assigned_to_Picklist and PicklistTask.
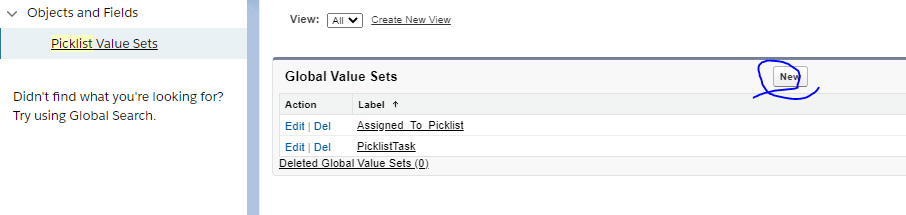
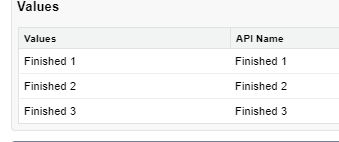
For Assigned_To_Picklist, you can input the names from the Setup – Users – Users. For PicklistTask, input Finished 1, Finished 2, and Finished 3 as shown below:
Now create the below fields in Activity Object, Finished_Task1, Finished_Task2, and Finished_Task3.


Create another Apex Trigger. This one is different than the others. The before insert ones above just place a zero into a record before it is creating while you upload a new record or create a new record on each of the respective objects: Nurse, Patient, Hospital, and Floor. The huge one with the prefixes basically I walk through in https://www.youtube.com/watch?v=qMbpP-HMAn0 if you want a step by step. (It's slightly different since the one I show you in this article is based on the Lookups that you added to the Activity Object (which is actually how you add fields to NEW TASKS) instead of the Lookups that are on the Task Object in Object Manager (Contacts, Leads, Accounts, etc.).
Another APEX Trigger:
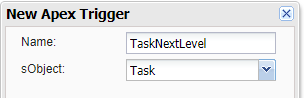
Paste in the below code.
trigger TaskNextLevel on Task (After Update) {
       List<Finished_Task1__c> newInvoices1 = new List<Finished_Task1__c>();
 List<Finished_Task2__c> newInvoices2 = new List<Finished_Task2__c>();
 List<Finished_Task3__c> newInvoices3 = new List<Finished_Task3__c>();
    for(Task t : Trigger.new){
        if(t.Status == 'Completed' && Trigger.oldMap.get(t.Id).Status != 'Completed' &&  String.valueOf(t.PicklistTask__c) == 'Finished 1' ) {
        Finished_Task1__c firstInvoice = new Finished_Task1__c();
        firstInvoice.PicklistTask__c = String.valueOf(t.PicklistTask__c);
        firstInvoice.Assigned_To_Picklist__c = String.valueOf(t.Assigned_To_Picklist__c);

        newInvoices1.add(FirstInvoice);
}else if(t.Status == 'Completed' && Trigger.oldMap.get(t.Id).Status != 'Completed' && String.valueOf(t.PicklistTask__c) == 'Finished 2' ) {
        Finished_Task2__c firstInvoice = new Finished_Task2__c();
             firstInvoice.PicklistTask__c = String.valueOf(t.PicklistTask__c);
        firstInvoice.Assigned_To_Picklist__c = String.valueOf(t.Assigned_To_Picklist__c);
        newInvoices2.add(FirstInvoice);
}else if(t.Status == 'Completed' && Trigger.oldMap.get(t.Id).Status != 'Completed' && String.valueOf(t.PicklistTask__c) == 'Finished 3' ) {
        Finished_Task3__c firstInvoice = new Finished_Task3__c();
            firstInvoice.PicklistTask__c = String.valueOf(t.PicklistTask__c);
        firstInvoice.Assigned_To_Picklist__c = String.valueOf(t.Assigned_To_Picklist__c);
        newInvoices3.add(FirstInvoice);
        }
    	}
    insert newInvoices1;
    insert newInvoices2;
    insert newInvoices3;
}
Another Apex Trigger FinishedTaskNext1 :
trigger FinishedTaskNext1 on Finished_Task1__c (after update) {

 List<Finished_Task2__c> newInvoices22 = new List<Finished_Task2__c>();
 List<Finished_Task3__c> newInvoices33 = new List<Finished_Task3__c>();

    for(Finished_Task1__c t : Trigger.new){
        if(t.PicklistTask__c == 'Finished 2' && Trigger.oldMap.get(t.Id).PicklistTask__c != 'Finished 2') {
        Finished_Task2__c firstInvoice = new Finished_Task2__c();
        firstInvoice.PicklistTask__c = t.PicklistTask__c;
        firstInvoice.Assigned_To_Picklist__c = t.Assigned_To_Picklist__c;
        newInvoices22.add(FirstInvoice);
}else if(t.PicklistTask__c == 'Finished 3' && Trigger.oldMap.get(t.Id).PicklistTask__c != 'Finished 3' ) {
        Finished_Task3__c firstInvoice = new Finished_Task3__c();
             firstInvoice.PicklistTask__c = t.PicklistTask__c;
        firstInvoice.Assigned_To_Picklist__c = t.Assigned_To_Picklist__c;
        newInvoices33.add(FirstInvoice);
        }
    	}
    insert newInvoices22;
    insert newInvoices33;


          }
Another Apex Trigger FinishedTaskNext2 :
trigger FinishedTaskNext2 on Finished_Task2__c (after update) {

 List<Finished_Task1__c> newInvoices222 = new List<Finished_Task1__c>();
 List<Finished_Task3__c> newInvoices333 = new List<Finished_Task3__c>();

    for(Finished_Task2__c t : Trigger.new){
        if(t.PicklistTask__c == 'Finished 1' && Trigger.oldMap.get(t.Id).PicklistTask__c != 'Finished 1') {
        Finished_Task1__c firstInvoice = new Finished_Task1__c();
        firstInvoice.PicklistTask__c = t.PicklistTask__c;
        firstInvoice.Assigned_To_Picklist__c = t.Assigned_To_Picklist__c;
        newInvoices222.add(FirstInvoice);
}else if(t.PicklistTask__c == 'Finished 3' && Trigger.oldMap.get(t.Id).PicklistTask__c != 'Finished 3' ) {
        Finished_Task3__c firstInvoice = new Finished_Task3__c();
             firstInvoice.PicklistTask__c = t.PicklistTask__c;
        firstInvoice.Assigned_To_Picklist__c = t.Assigned_To_Picklist__c;
        newInvoices333.add(FirstInvoice);
        }
    	}
    insert newInvoices222;
    insert newInvoices333;


          }
Another Apex Trigger FinishedTaskNext3 :
trigger FinishedTaskNext3 on Finished_Task3__c (after update) {

 List<Finished_Task2__c> newInvoices2222 = new List<Finished_Task2__c>();
 List<Finished_Task1__c> newInvoices3333 = new List<Finished_Task1__c>();

    for(Finished_Task3__c t : Trigger.new){
        if(t.PicklistTask__c == 'Finished 1' && Trigger.oldMap.get(t.Id).PicklistTask__c != 'Finished 1') {
        Finished_Task1__c firstInvoice = new Finished_Task1__c();
        firstInvoice.PicklistTask__c = t.PicklistTask__c;
        firstInvoice.Assigned_To_Picklist__c = t.Assigned_To_Picklist__c;
        newInvoices3333.add(FirstInvoice);
}else if(t.PicklistTask__c == 'Finished 3' && Trigger.oldMap.get(t.Id).PicklistTask__c != 'Finished 3' ) {
        Finished_Task2__c firstInvoice = new Finished_Task2__c();
             firstInvoice.PicklistTask__c = t.PicklistTask__c;
        firstInvoice.Assigned_To_Picklist__c = t.Assigned_To_Picklist__c;
        newInvoices2222.add(FirstInvoice);
        }
    	}
    insert newInvoices2222;
    insert newInvoices3333;


          }
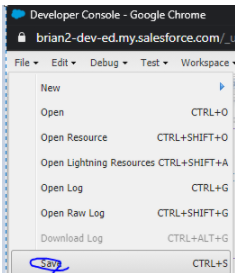
save your APEX code and close our your Developer tab. Obviously saving doesn't work if there are problems at the bottom:
Add the below 2 columns to your Finished_Task1, Finished_Task2, Finished_Task3 Objects, also add them to your Activity Object.


You can add PicklistTask now to your page layouts if you want to see which Nurse the patient is going to next on any of the Related Lists when you click in the blue letters for the first column.
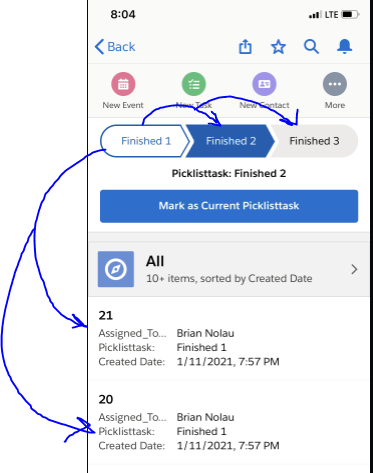
Now set up the Path with the picklists on the Record Page for Finished_Task1, Finished_Task2, Finished_Task3. You can't use Paths on App pages.
Record path in Lightning Record pages…move from stage to stage in case need to move backwards in process, Save this page to FinishedTask 1,2,3
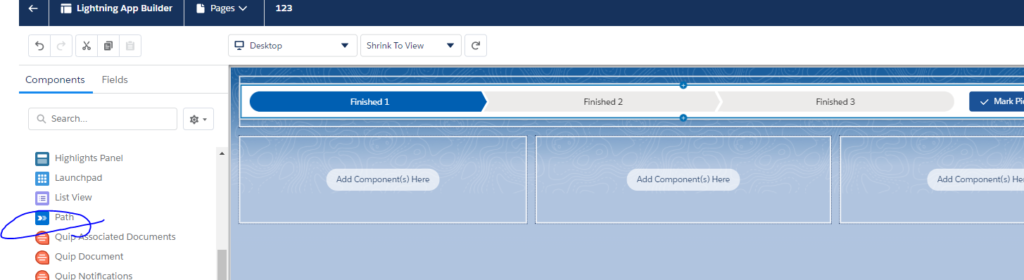
basically, when you seelct your task you select which stage to skip to also…same picklist:
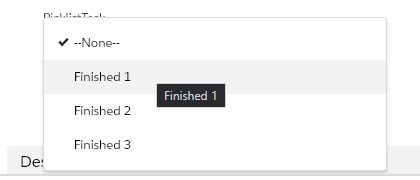

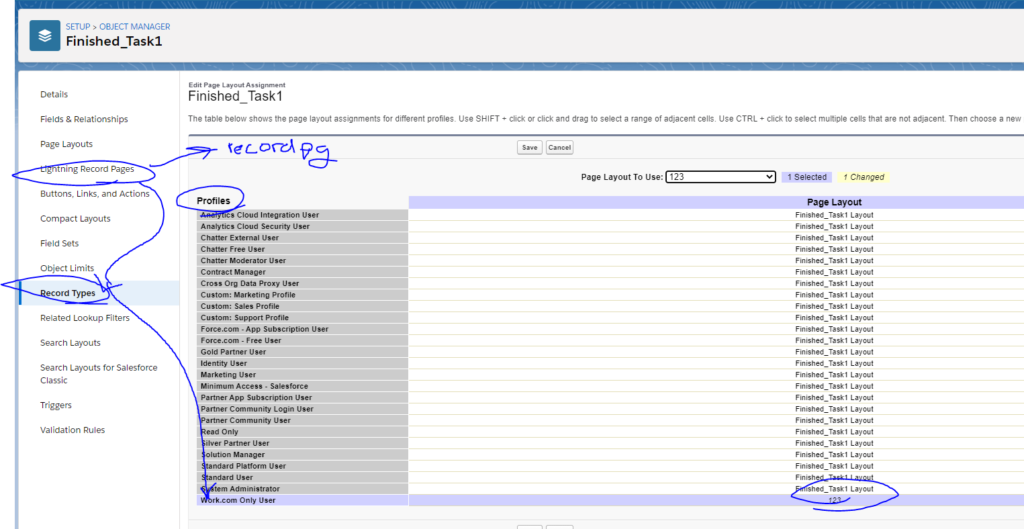

Do the above for Finished Task 1, 2, 3. Can move between any stage. Move tasks from person to person on their object instead of their record. Pass work differently.
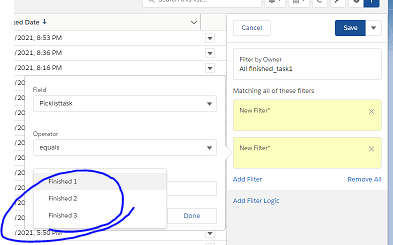
Add in the below to filter the pages by only FinishedTask1, FT2, FT3:
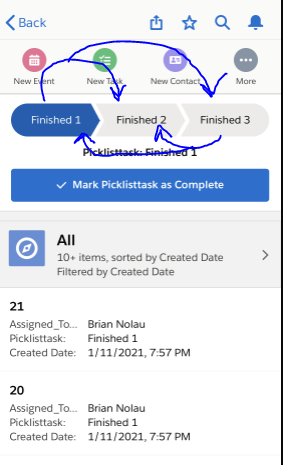
Select Save. How this code works is when a task is "Mark as Completed," a record is created with whichever value you select on the Picklist (Finished 1, Finished 2, or Finished 3. You can select up to 100 values in each picklist.) Show it on mobile. Show it on desktop. Desktop lets you select all and move them to another stage. This enables fast task passing among objects back and forth and back and forth and back and forth to juggle tasks.
System Record Fields with a SOQL query and what ID Field is (then upload file auto-assign with Process builder).. then create an app that shows the tasks change and show it on Mobile live as you mark stuff as completed:
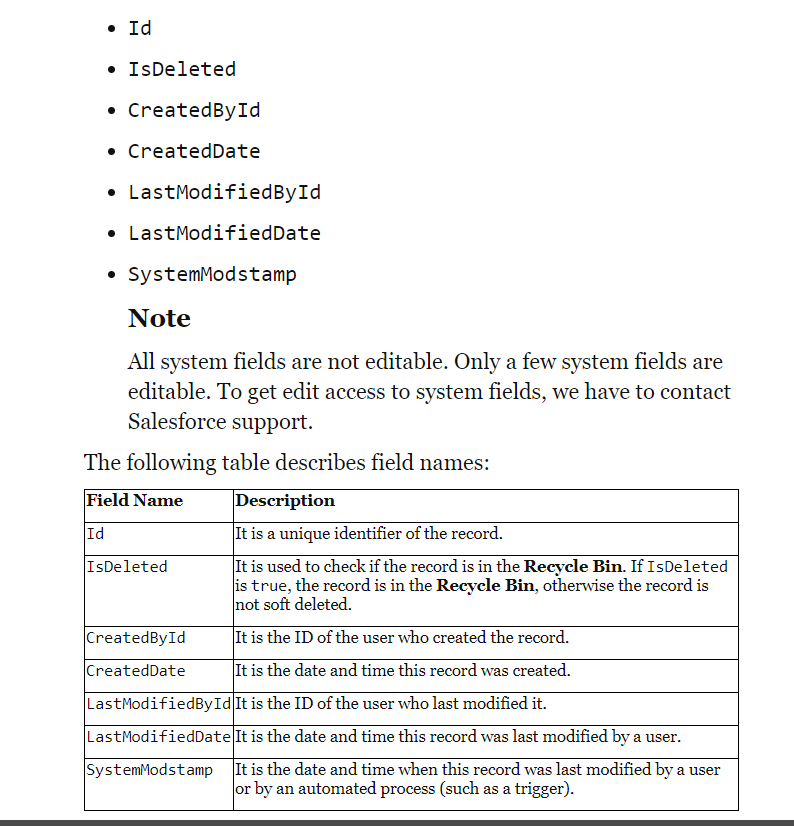
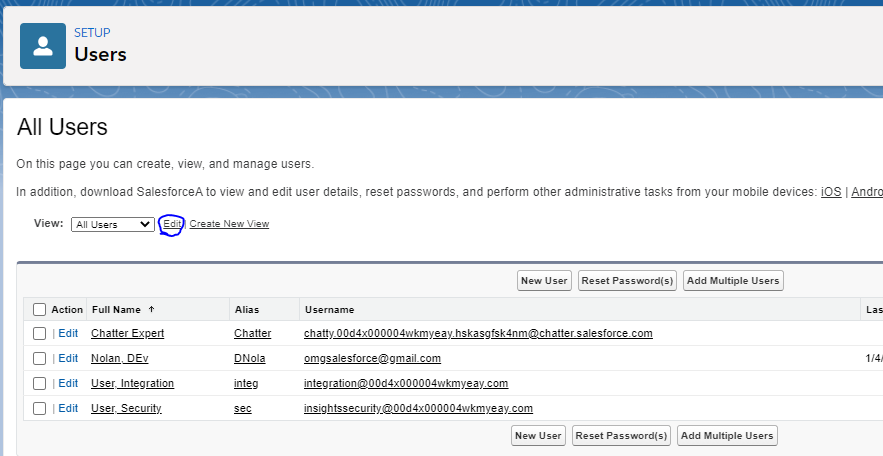
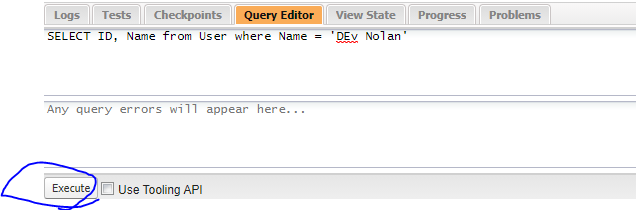
In order to retrieve a specific User Id, then go to Setup – Users – Users. The names are written as last name, first name:
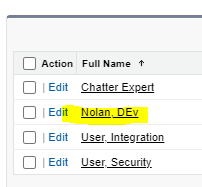
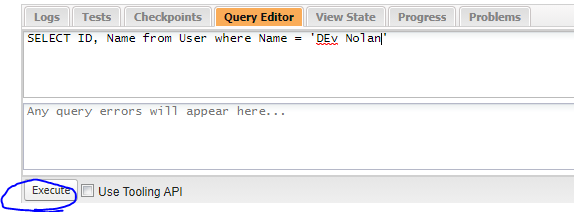
If you open up your Developer Console, then you can search up ID for individual Salesforce users as shown below.


<>>>><<
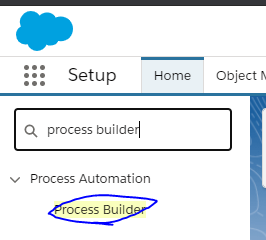
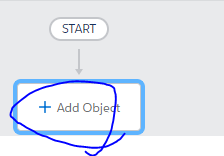
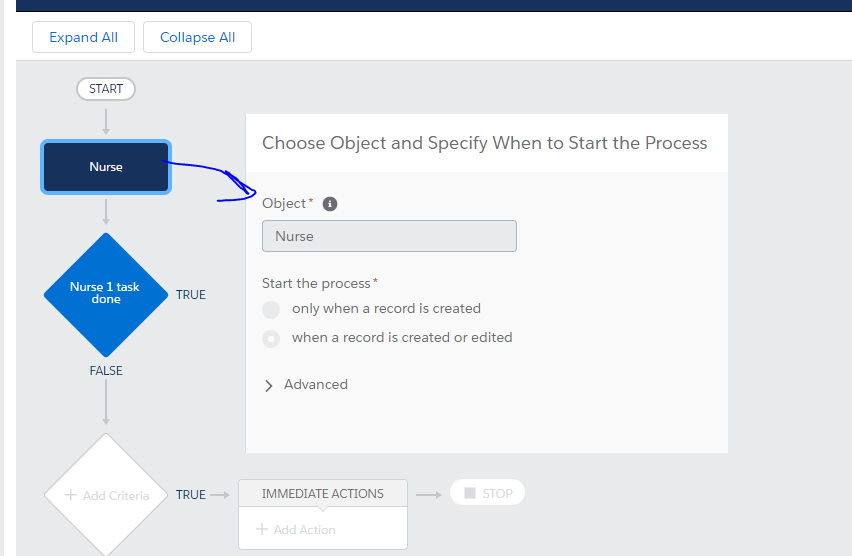
Step 20: Create the Process Builder so that when you upload Patients they will auto-assign tasks to up to 50,000 upload records using your custom logic created in Process Builder.
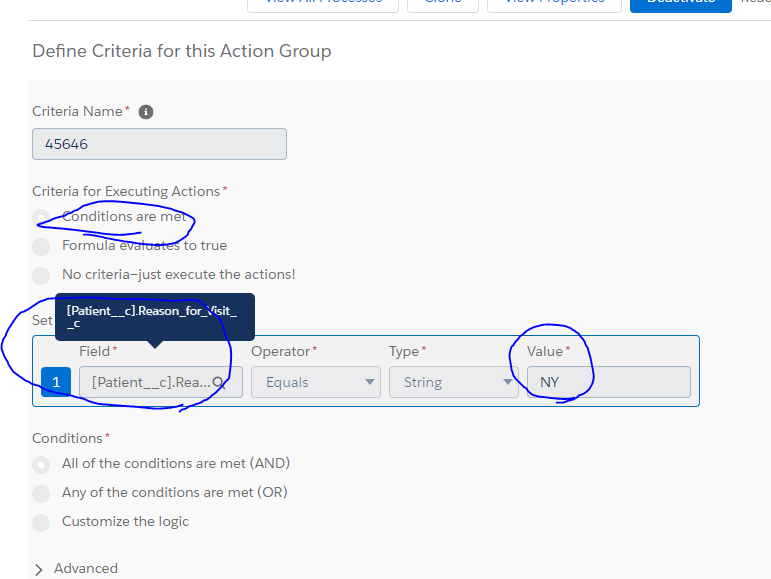
Press New, enter a Process Name like Create Task if Patient Column says NY. Select "A Record Changes. Click Save.

Click here:
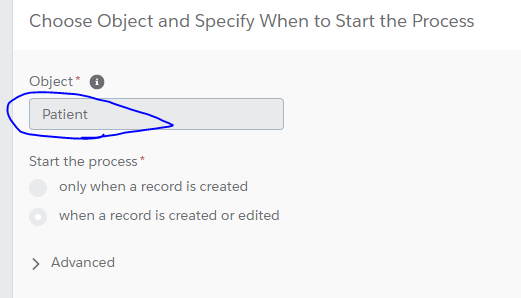
Select Patient, select when a record is created or edited. save/next
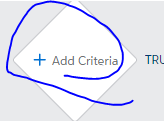
Click here:
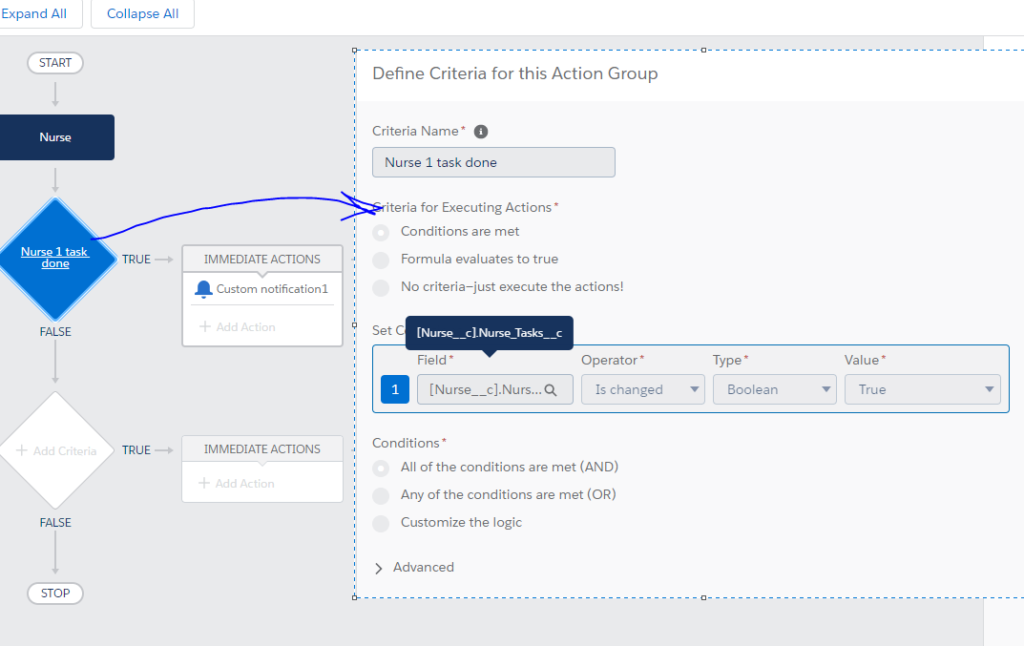
For Value, select whichever value you want to cause a task to be assigned. In this case if the new Patient record either being uploaded or created has a value of "NY" under Reason for Visit, then it will auto-create a task for a particular Nurse, Hospital, Patient, Floor, and/or User.
click save/next. Last step you fill out like below. For ID's do the same step as retrieving the ID as you did before, I'll explain below this image.
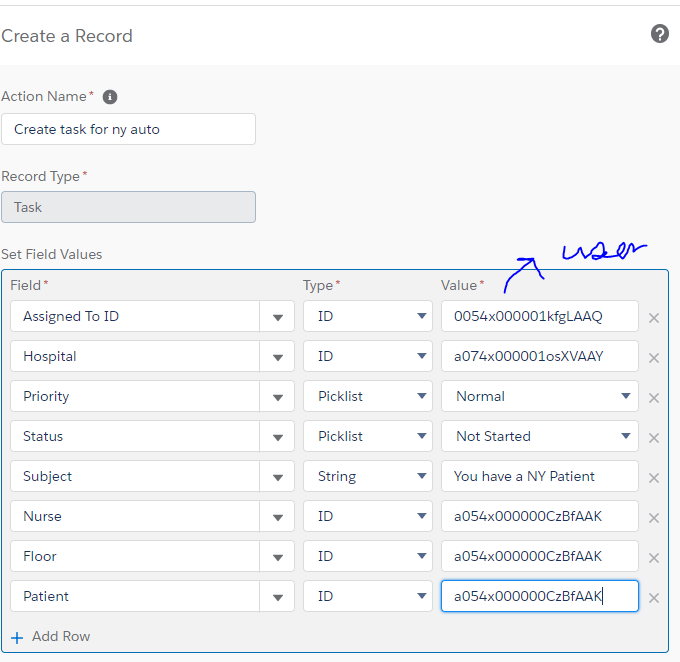
How to get User, Nurse, Hospital, Floor, Patient IDs:
User:

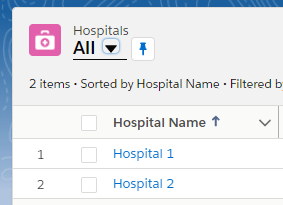
Hospital (Please note that NAME is from the below column:
Code (you use __c since Hospital is a custom object):
SELECT ID, Name from Hospital__C where Name = 'Hospital 1'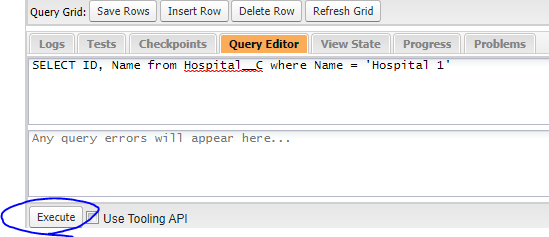

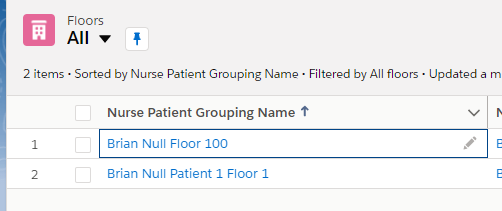
Floor:
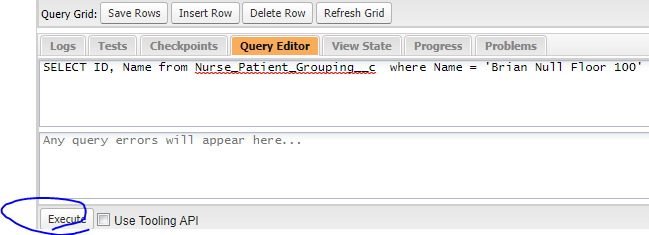
Code:
SELECT ID, Name from Nurse_Patient_Grouping__c where Name = 'Brian Null Floor 100'
same thing for patient…
Example Upload File:
You're going to create a patient upload file as shown below for these columns. Replace the SOQL SELECT Queries with the respective IDs just like you did in Process Builder for the respective objects.) You should obviously have a list handy of your objects and records for a quick vlookup.

Excel Format – File – Save as CSV – UTF 8 (Comma Delimited) under Save As Type… the file name doesn't matter.

Example upload file. Please note that I retrieved the Nurse and Hospital using SOQL Query Editor as explained before to retrieve the ID of a particular Nurse and an ID of a particular Hospital. If there are two records with Hospital 2 in different states, then obviously you can do SELECT ID, Name, State__c from Hospital__c where Name = 'Hospital 2' to determine which ID you want. Please note that I excluded the Floor in this upload. Think of Floor as a manual table that you use to pair a Doctor to a Hospital and a Patient to that Doctor. You can delete a Floor and manually reassign a Patient to a new Floor since their floor record becomes Null. The Doctor can then be paired to a new floor.
SELECT ID, Name from Nurse__c where Name = 'Doctor Two'SELECT ID, Name from Hospital__c where Name = 'Hospital 2'Please note that you cannot upload to Lookup fields with the standard uploader "Import."
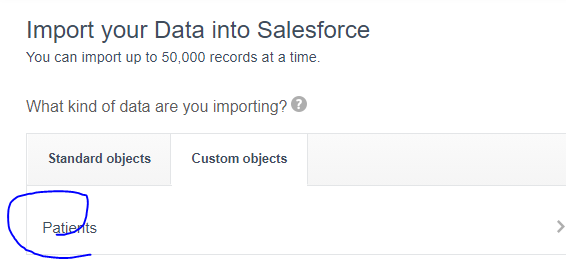
To upload, go to the Patient Object. Select import at the top right.
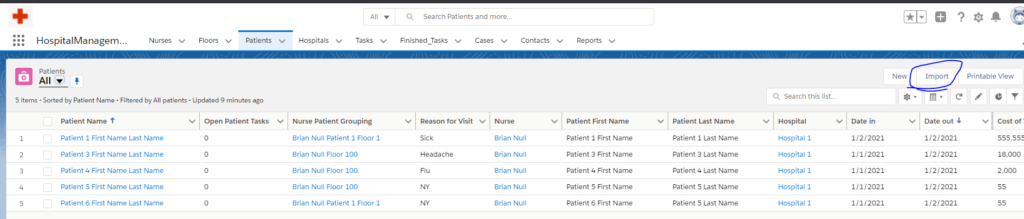
Click Patients:
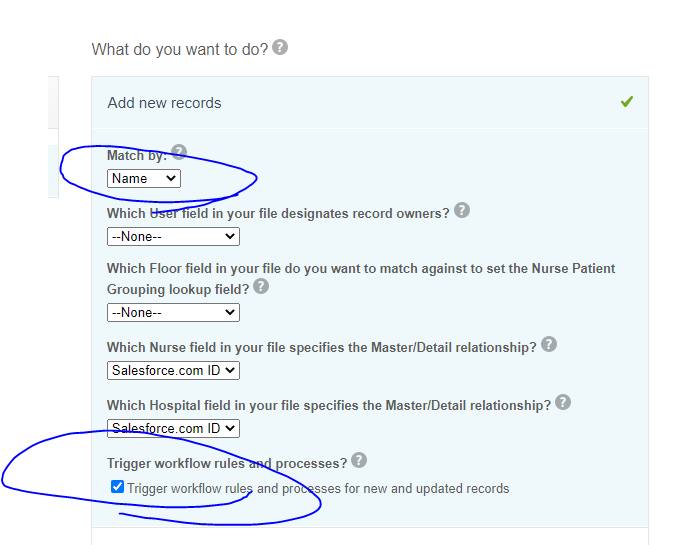
Click Add New Records, Click and select Name, Check Trigger Processes to enable the Process Builder logic to apply to the upload.
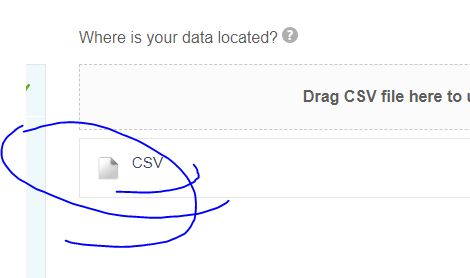
Click CSV.
Click Choose File.
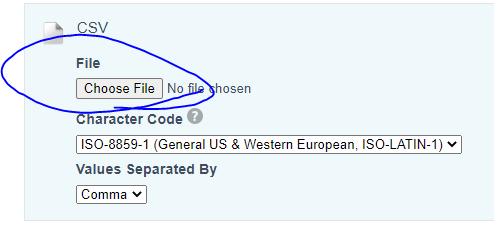
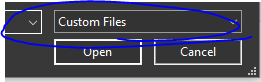
Click at the bottom right and change Custom Files to All Files. Navigate where you saved you upload and select it.
Click Next
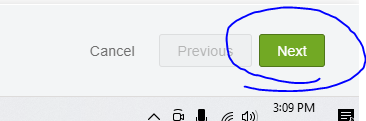
The columns will auto-match based on the first row name:
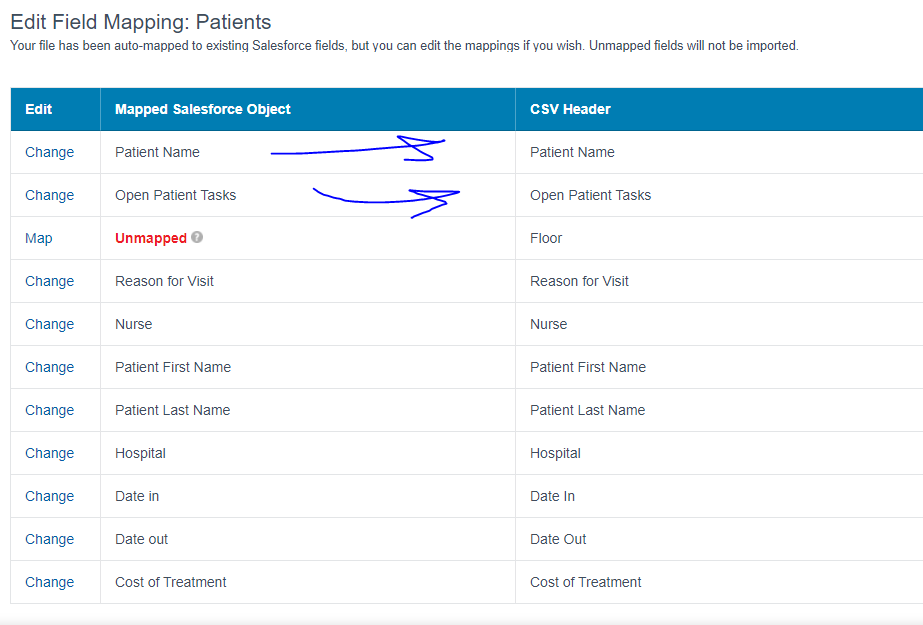
Press Next, Press Start Import.
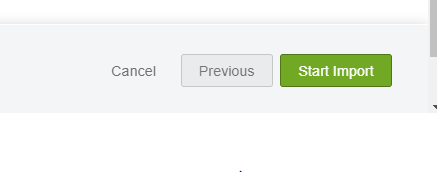
CHECK IF ANY RECORDS FAIL TO IMPORT:
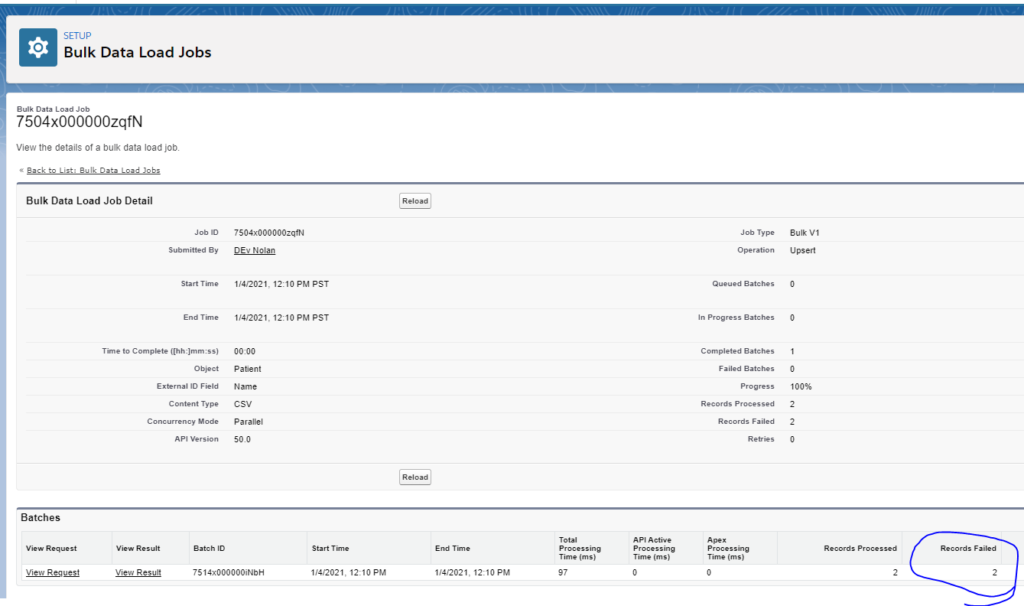
Everything works. You can watch my youtube video to find out how to work the cost of patient values properly and pass values from object to object. Now you can create records.
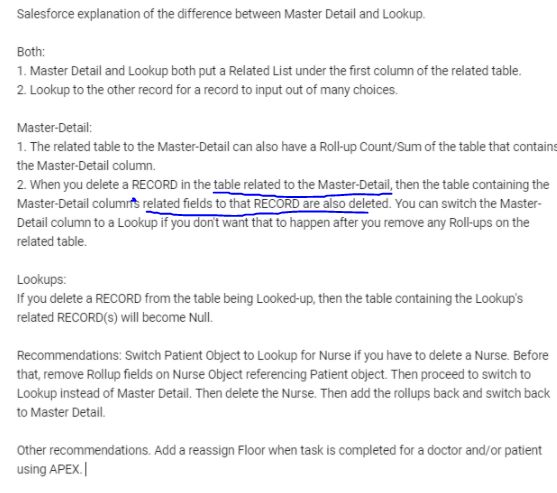
If you keep the below in mind, then all you would need to do is upload Patients and the table relationships take care of themselves. Only thing to think about is deleting a Nurse deletes the records of Patients and/or Floors associated with that Nurse. Deleting a Hospital also deletes Patient Records and/or Floors mentioning that Hospital. You obviously won't be deleting hospitals. While deleting a Nurse, you can keep All Patient records, even those related to that Nurse, by doing the following. Remove all Roll-up Columns on Hospital AND/OR Nurse Objects. Switch the Patient Master-Detail for Nurse Field to Lookup. Delete the Nurse record in question. Switch that Nurse Field back to Master-Detail and add your Roll-up Fields back to Hospital AND/OR Nurse Objects. (This same process would work if you were deleting a hospital.) Besides that, if you delete a Floor nothing happens besides related Patient's floor's becoming Null. All records remain as is with a Floor deletion. All records remain as is with a Patient deletion.
^^ but based on that whole reassigned thing see my PICKLIST note at the bottom. You can have like 100 stages for the Tasks.
How exactly do you add an additional page onto your Mobile app like Live Task Reports in the below video (from the top of this page?)
Step 1: Setup – select an object like Floor – Select Lightning Record Pages, press NEW on the right hand side:
Select App Page. Name Label Live Task Report Dashboard. Select the layout you want like Header and Three Regions. Click Finish. Drag the below two Components from the left-hand side onto the Add Components Here.


List View lets you place the custom objects that you created. Click Object on the right-hand side and select the Custom Object that you want.
Report Chart lets you place charts created from the Report object. I review how to save Public Reports in my Salesforce Inventory Management video: https://www.youtube.com/watch?v=eqyy4P7y_uc
In this case, I obviously made the report like below:
Go to Report Object – New Report – Tasks and Events – Continue – under Add column on the left-hand side, search Closed, click Closed.
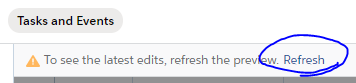
Click Refresh.
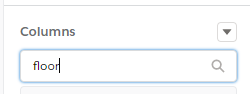
Search Floor, Hospital, Nurse. Click all. Click Refresh.
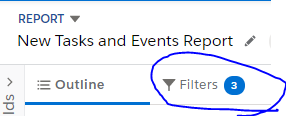
Under Filters ^, select Show me All Activities, Date All Dates, Show Open and Closed Activities, Show Tasks.
Switch back to Outline.
Drag these up:
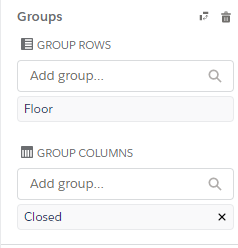
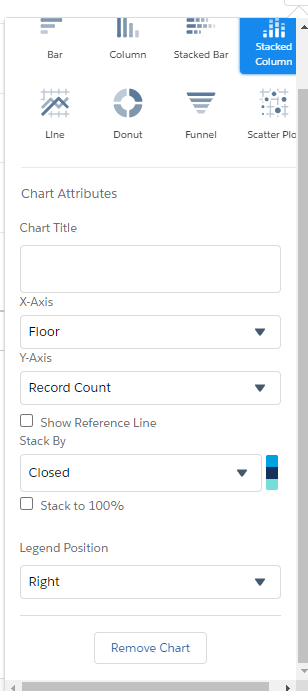
Click the chart, select the Gear and do Stacked Columns.
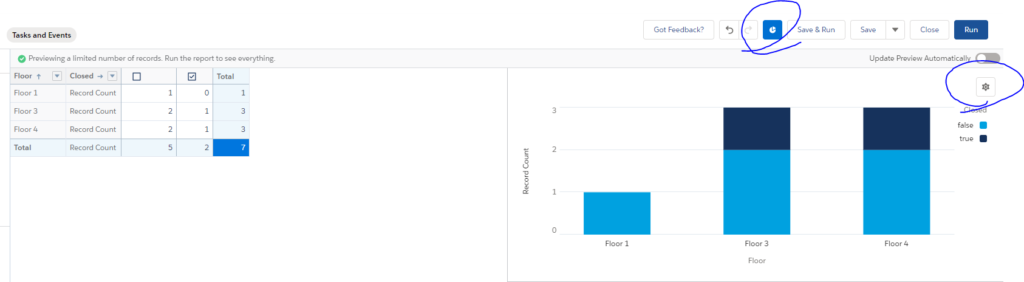
Click Save and Run.

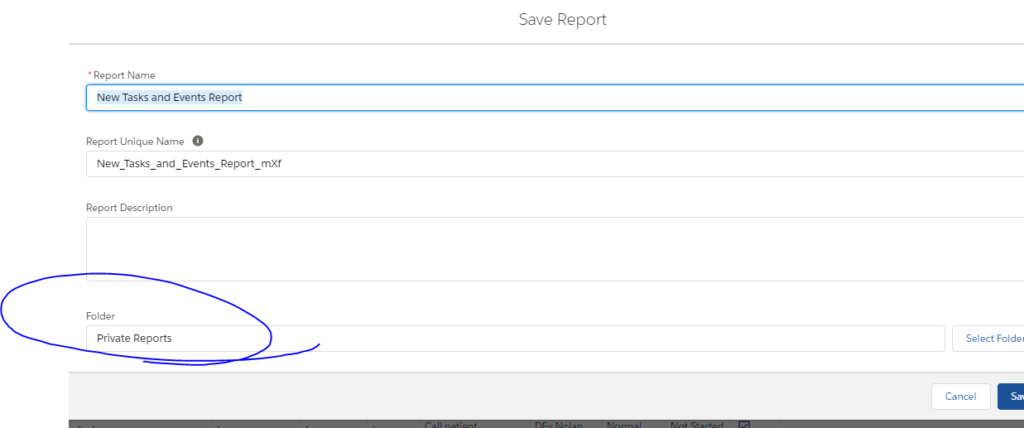
Click Public Reports then save. You can click this Report in the Report Chart Component on the Lightning Record Page.
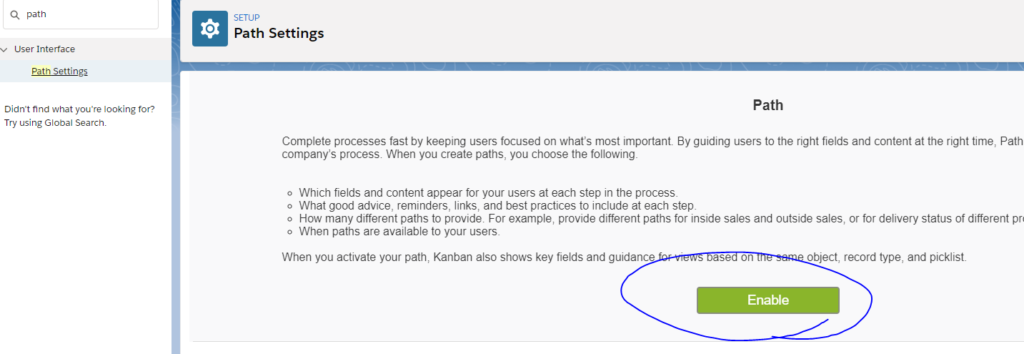
Keep in mind that on Lightning Record Pages if you add a Component called Path, you can create a New Path with a picklist that I show you at 46:09 in this video: https://www.youtube.com/watch?v=XyMRPtRnjCc. You can then add a max of 100 values to this picklist to this path. Each value can represent a stage like Opportunities in this video at 5:49 onward: https://www.youtube.com/watch?v=aZ9S97rfRWI. Obviously you can create 100 different stages similar to Closed Won and then using APEX move the tasks across 100 different objects based on the Picklist value for each stage of the task like "Lobby" or "Parking Lot." Different User profiles can have different picklists using Record Types. You can also make dependent picklists dependent on other picklist 20:54: https://www.youtube.com/watch?v=bUsVhWw7kMQ
If your lookup bothers you because there are two Hospital 1's in different states, obviously you could create a different table looking up the state from Hospital with a Master-Detail column on Hospital pointing to a State Object which will show all the hospitals by state.
OR, you could be lazy and do a Search Layouts –> Setup – Object Manager – Hospital – Search Layouts – System Administrator and press edit. Move state over and save. Now when you go to Master-Details pointing to Hospital such as the Patient Object, you can include Country and state per third image below or however many details you need to differentiate.

You can tell your user profile from Setup – Users – Users
In Lightning Record Page, App that you create also get added to your Navigation Menu:
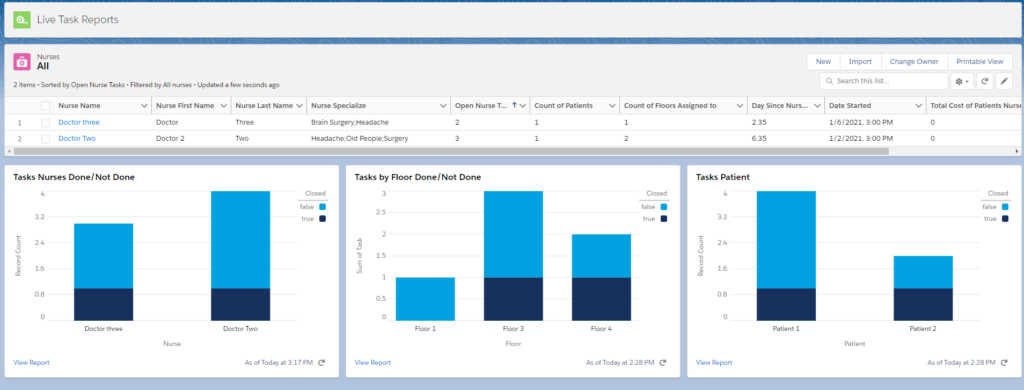
You can obviously edit the amount of records shown in custom made pages. In the below I have 3 Report Chart Components and a List View with the Nurses Object on Desktop just like on the 1st video on this page.
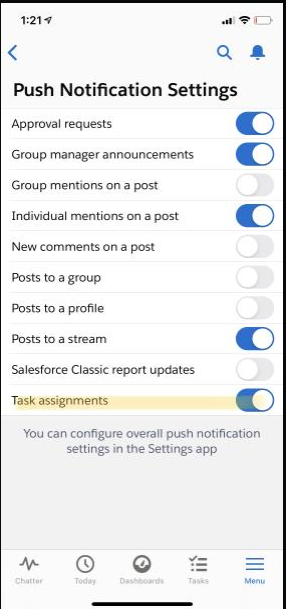
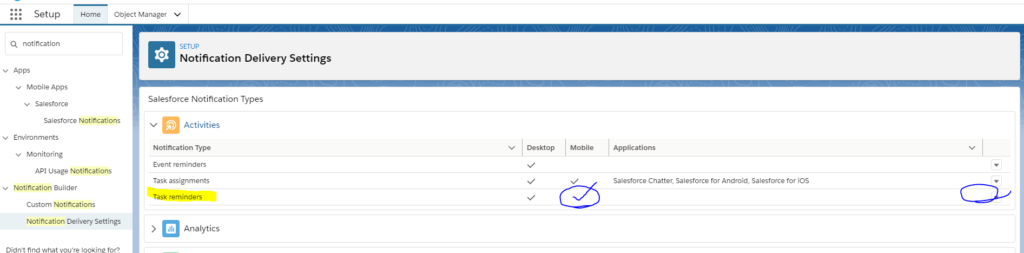
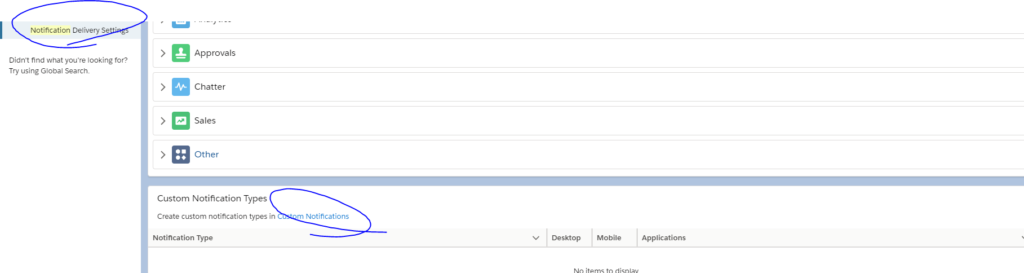
How to setup notifications (watch my video…I don't recommend Reminders, so Stage 1 for Groups and Stage 2 to do Custom Notifications are all that are needed:)
Please note that Task Notifications don't appear when you assign them to yourself unless you follow the below steps then they can appear on your Apple watch:

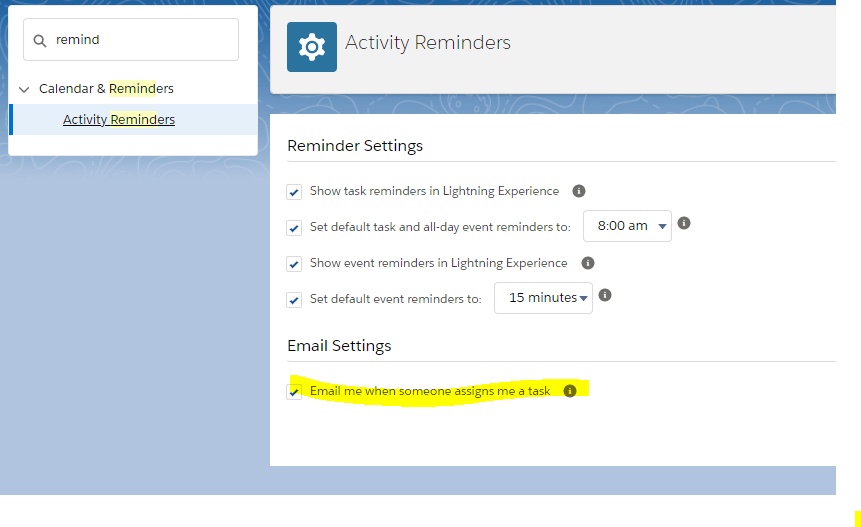
To enable notifications when someone else assigns you a task:
The below sets it so that you get an email when someone assigns you a task.
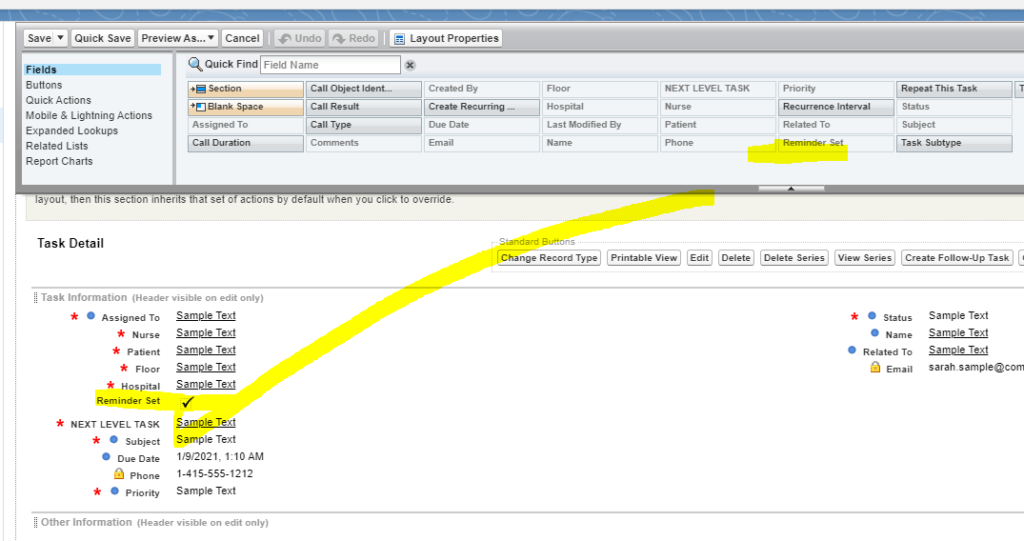
If you want to get a notification for a self-assigned task, then set a reminder in Page Layout under the Task Object, just drag that field onto your New Task.
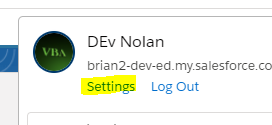
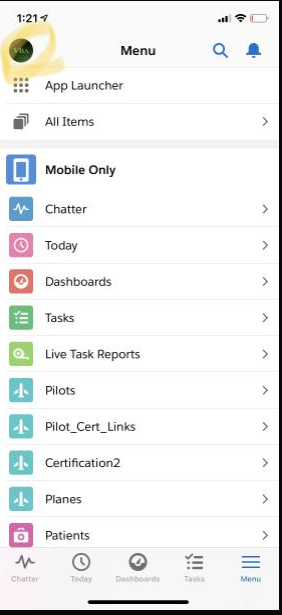
In the mobile app click your profile at the top left:
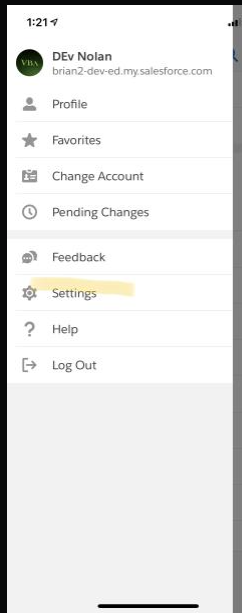
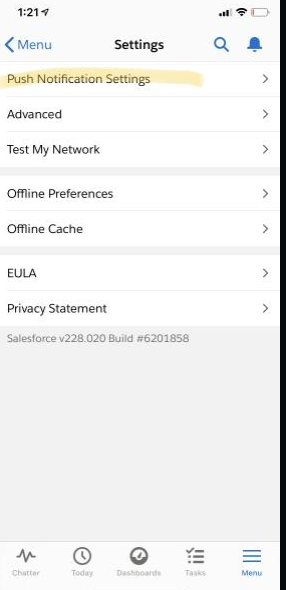
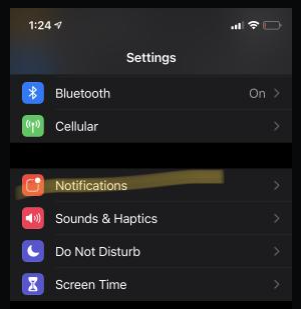
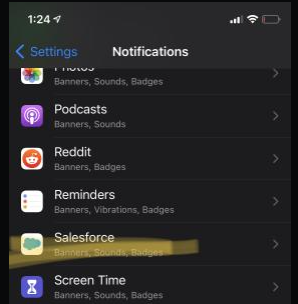
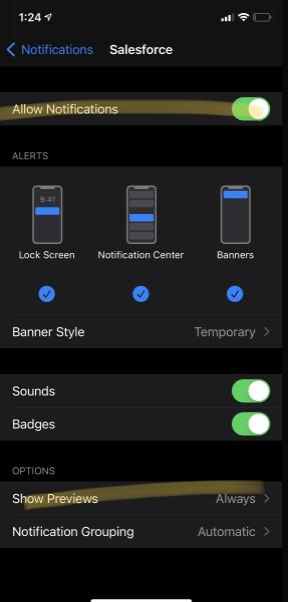
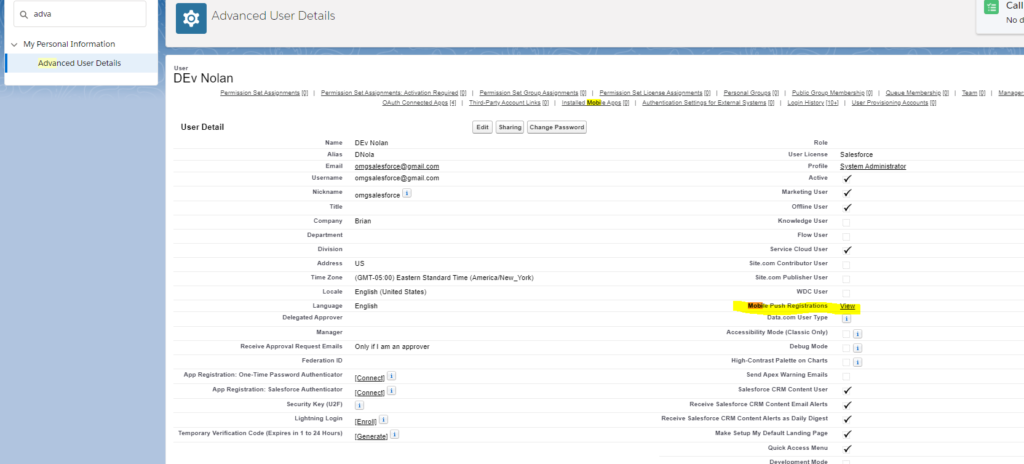
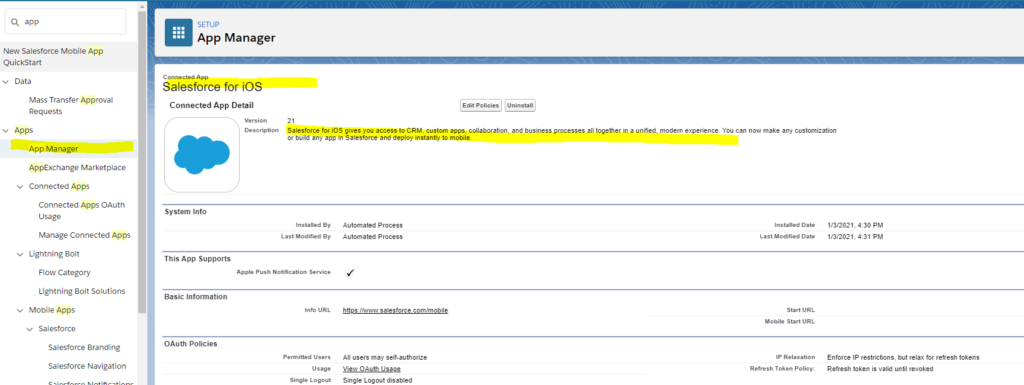
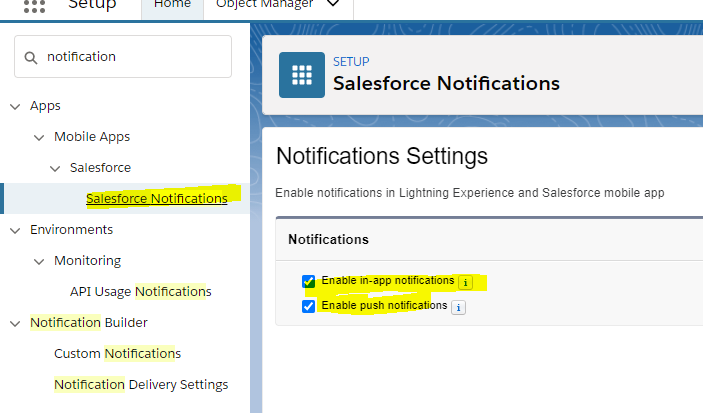


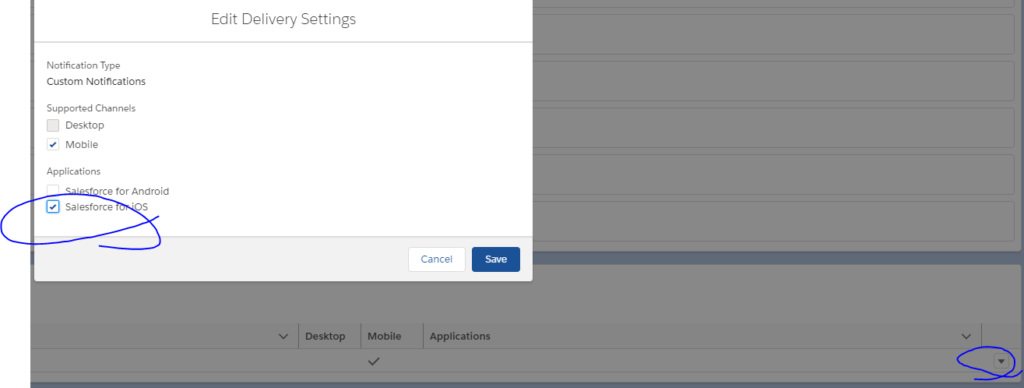
Once you check Salesforce for IOS, in the app when you click your profile picture at the top left and select Settings you'll see Custom Notifications button which you can enable (Or whatever you named your custom notification). You can make as many as you want for various tasks.
Process Builder To Set up a Notification for Every Single Time a Nurse Task is Assigned or completed.
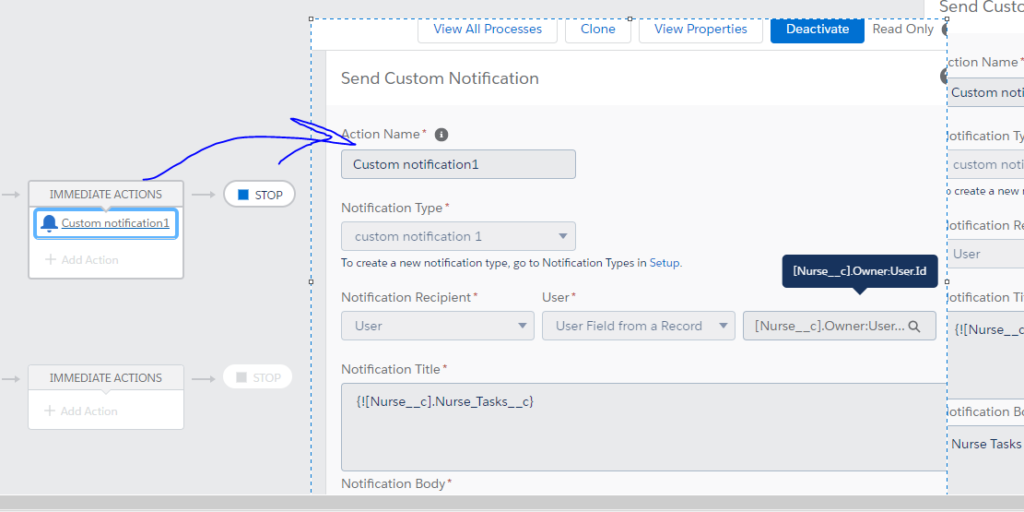
Now your Bell will get a 1 when a task is assigned to Nurse Doctor Two based on the process builder. It says 4 tasks when you click it.
If you make other Users, dont forget to click Setup – Users – Users – Edit to change No of tasks to 0.

Excel VBA Filter